 Why You Can Trust CNET
Our expert, award-winning staff selects the products we cover and rigorously researches and tests our top picks. If you buy through our links, we may get a commission. Reviews ethics statement
Macs have changed a lot over the years. We're now deep into the new era of Macs, with modern Macs powered by Apple's own chip -- including MacBook laptops, iMac all-in-ones, Mac Mini and Mac Studio desktops. All of these still let you take screenshots the same way, though, with three basic methods using keyboard shortcuts. If you've still got an older MacBook Pro with the Touch Bar, you can also use a fourth method. MacOS also gives you a fair number of options to easily save, delete and open the screenshot for markup.
These tips also apply to the latest Macs, such as the 14-inch MacBook Pro with an M3 chip and the M3 MacBook Air. We've also tested these tips to confirm they work in MacOS Sequoia, the latest operating system update. Note that the methods we have mentioned below are keyboard shortcuts, so you can press those keys simultaneously to take a screenshot.

Watch this: How to take Mac screenshots
02:07
Method 1: Cmd-Shift-3
This keyboard shortcut captures a screenshot of your entire screen.
Method 2: Cmd-Shift-4
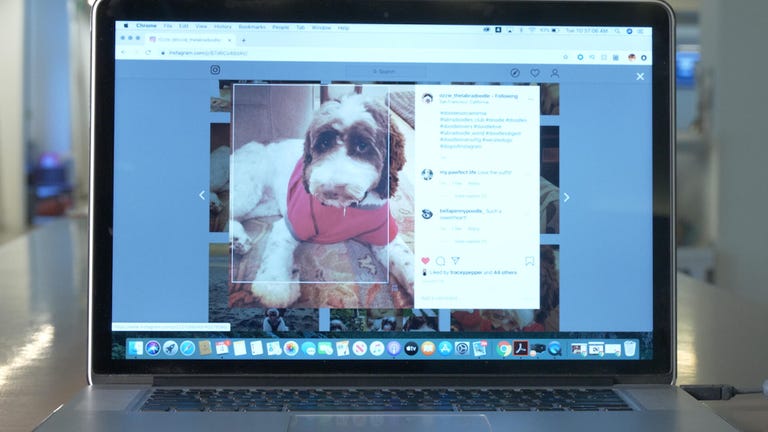
Use this keyboard combo to turn your cursor into a crosshair, which you can drag to select a portion of your screen to capture. Release the mouse button or trackpad to take the shot.
You have a number of other options after hitting Cmd-Shift-4:
Press and release the spacebar: The crosshair turns into a little camera icon, which you can move over any open window. Click on your desired window to take a screenshot of it. A screenshot captured by this method features a white border around the window with a bit of a drop shadow.
Press and hold the spacebar (after dragging to highlight an area but before releasing the mouse button or trackpad): This locks in the shape and size of the selection area but lets you reposition it on the screen. It's very handy if your initial selection area is off by a few pixels; just hold down the spacebar to reposition it before releasing the mouse button to snap a screenshot.
Hold down the Shift key (after dragging to highlight an area but before releasing the mouse button or trackpad): This locks in each side of the selection area made with the crosshairs save the bottom edge, letting you move your mouse up or down to position the bottom edge.
Without releasing the mouse button, release the Shift key and hit it again to reposition the right edge of your selection area. You can toggle between moving the bottom edge and right edge by keeping the mouse button or touchpad engaged and pressing the Shift key.
Method 3: Cmd-Shift-5
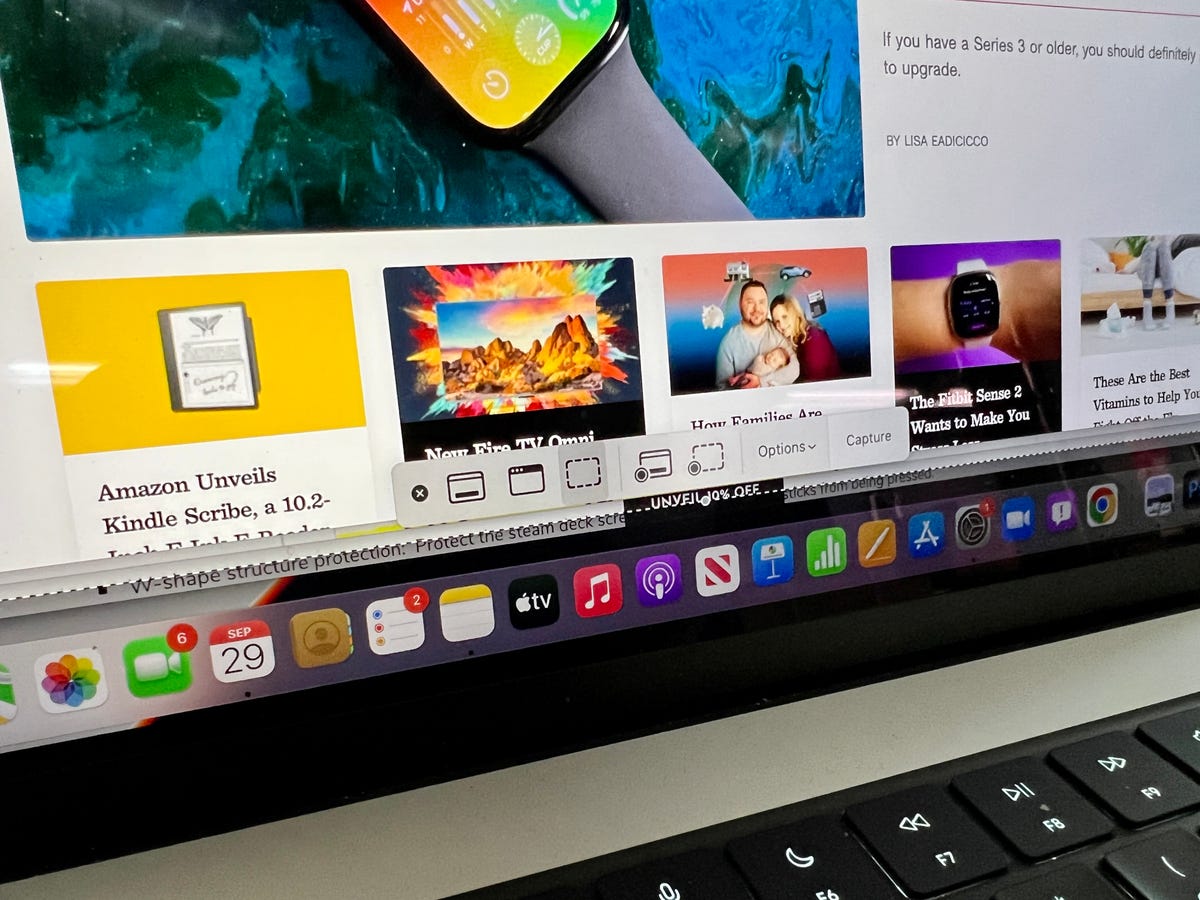
A shortcut command introduced way back in MacOS Mojave in 2018, Cmd-Shift-5 calls up a small panel at the bottom of your display with your screen capture options. There are three screenshot buttons that let you capture the entire screen, a window or a selection of your screen.
Likewise, the two video-recording buttons let you record your entire screen or a selection of it. On the left is an X button to close the screenshot panel, but you can also just hit the Escape key to exit out.

Your CMD-Shift-5 options.
Dan Ackerman/CNETOn the right side is an Options button. It lets you choose where to save your screenshot -- Desktop, Documents, Clipboard, Mail, Messages, Preview or Other Location, and set a 5- or 10-second delay so you can line up items that might otherwise disappear when you engage your screenshot tool.
By default, the Show Floating Thumbnail option is enabled, which puts a little preview thumbnail of your just-captured screenshot in the lower-right corner of your screen, similar to the screenshot procedure with iOS. Unlike on your iPhone, you can turn off this preview thumbnail on your Mac. Lastly, you can choose to show your mouse pointer in a screenshot or video.
If the screenshot panel is in your way, you can grab its left edge and drag it to a new spot on your screen.
Bonus for Touch Bar MacBooks: Cmd-Shift-6
If you've got an older MacBook Pro with the Touch Bar, you can also take a screenshot of what's currently showing on the Touch Bar. Just hit Cmd-Shift-6 to take a very wide and skinny screenshot of your Touch Bar.

Easy annotation
If you embrace the Floating Thumbnail, you'll gain quick access to Markup tools to annotate your screenshot. You can swipe the Floating Thumbnail away or just let it slip away on its own and it'll be saved to the spot you last saved a screenshot. Click the Floating Thumbnail and it'll open in a Markup View preview window (but not Preview) with all of the markup tools you get in Preview.
You can right-click the Floating Thumbnail to:
- Save the screenshot to your desktop, Documents folder or clipboard.
- Open it in Mail, Messages, Preview or Photos.
- Show in Finder.
- Delete.
- Open it in the Markup preview window described above.
- Close (and save).
Longtime Mac screenshotters may be slow to adopt the Cmd-Shift-5 shortcut, but I find myself using it more for the ability to annotate screenshots without needing to open Preview, and quickly delete screenshots that I know immediately I messed up. The 5- and 10-second delay options are also useful and appreciated additions.