During a research session, you often uncover little bits of information that you eventually bring together to form a hypothesis. This tends to work best because users rarely know exactly what they want, so by learning a little here and there, you can come to understand more about your target than they could’ve outright communicated to you. Although an “investigative” approach like this costs time and money, it’s worth it if people end up with even better products than they could’ve imagined.

This article walks you through what participatory design research is and how it helps your users show you how they want their websites and apps to be.
What is participatory design research?
Participatory design research involves putting users in the designer’s seat and having them design the app/website in a way that makes sense to them. This can include sketching, diagramming, and/or card sorting.
You might’ve heard participatory design referred to as co-design. However, now that Adobe XD calls its synchronous collaboration feature co-design, people have shifted towards using the term participatory instead.
What are the benefits of participatory design research?
The main benefit of participatory design research is that users are able to show you what they want so that you don’t have to waste unnecessary amounts of time and money trying to figure it all out. It’s a treasure hunt without the hunt.
Besides that, users feel empowered to demonstrate those wants, providing you with the contextual understanding you need to craft a great user experience. This isn’t to say that one participant gets to decide the app/website’s design. You will acquire a variety of perspectives that you can use to design inclusively.
3 participatory design methods
When it comes to participatory design, there are three main methods that you can employ:
1. UX sketching
UX sketching is the standard exercise for participatory design research. With this method, participants sketch their ideal app/website experience. It’s usually a pen-and-paper exercise, as some participants won’t know how to use professional UI design tools. The sketches can then be digitized using a camera.
Why do UX sketching?
UX sketching directly answers a lot of questions, particularly about layout and flow. When I ask users to sketch their ideal experience, I find myself already halfway there by the end of the exercise. It’s super useful.
When to do UX sketching
As much as I’d love to have users willing to help me for free 24/7, research costs time and money, so I don’t think I’ve ever done UX sketching more than twice for a single project. It’s research that you recruit for at the start of a UX project, and just try to make the most of it.
As long as you have clearly defined functional requirements, you can do UX sketching right off the bat. You’ll use these functional requirements as a sort of checklist to push the UX sketching exercise forward.
How to do UX sketching
To start, first determine what function users are most likely to attempt (you can ask them if you don’t already know). Then, instead of asking them to sketch a complete layout of each page in-sequence, ask them to explain their thought process (i.e., what they’d do and how they’d do it) as they sketch:
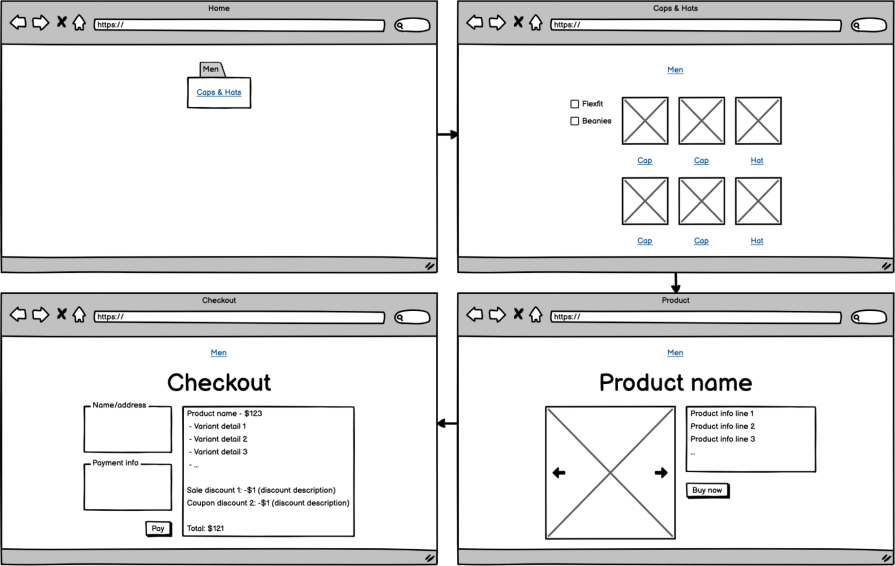
A participant’s sketch depicting their ideal purchasing experience focuses only on the UI and information that they need to accomplish that specific goal.
After that, move on to another function, continuing to encourage participants to sketch their preferred design as they use it. However, make it clear to participants that it’s okay to change their design or even start over as they re-encounter pages/screens they’ve already sketched. Design often requires compromise, so participants must be able to iterate until they’re satisfied.
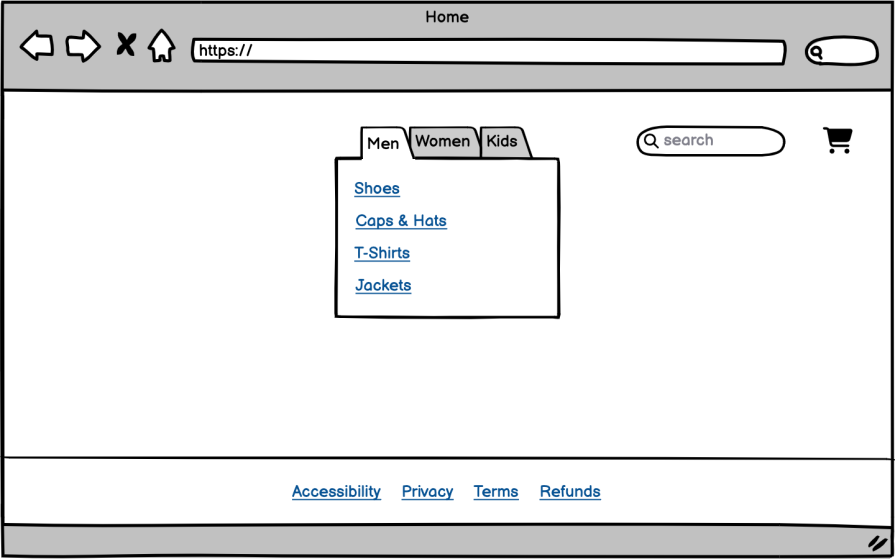
Once all the main functions have been mapped out and sketched, move on to the miscellaneous user needs (anything else that users might need to do on the app/website, such as contacting customer support). Do the same thing with the business needs as well — for example, where should the link to the terms and conditions be?
A later (but not final) iteration of that first page after sketching in some user and business needs.
If you’d like help designing individual components, the four-step sketch methodology is beneficial for acquiring confident, refined ideas from participants:
- Note for 20 minutes (this helps users assess their needs before sketching)
- Build on those notes visually for another 20 minutes
- Sketch 8 concepts in 8 minutes (they can be built off of an idea from step 2 or spun off of another concept, so this isn’t as scary as it seems)
- Sketch the final solution, perhaps as a 3-step storyboard
2. User journey mapping
User journey mapping is the UX process for diagramming the steps that users take to accomplish certain goals. If you’d like to speed through this process, have users themselves do it.
Why do user journey mapping?
User journey mapping helps you understand how a user thinks through accomplishing a goal. This includes the steps they’d take and how they’d want them broken down. For UX designers, this informs the functions and information architecture across the different pages/screens.
When to do user journey mapping
You can do user journey mapping with users instead of UX sketching, which would be cheaper (albeit with fewer insights). You can also do it before UX sketching to help users storyboard their ideal experience first, avoiding a scenario where participants try to think like designers rather than the users that you need them to be.
How to do user journey mapping
User journey mapping is the same as UX sketching, but instead of sketching, users should storyboard their ideal experiences as flowcharts. Naturally, you won’t acquire any UI design insight, though:
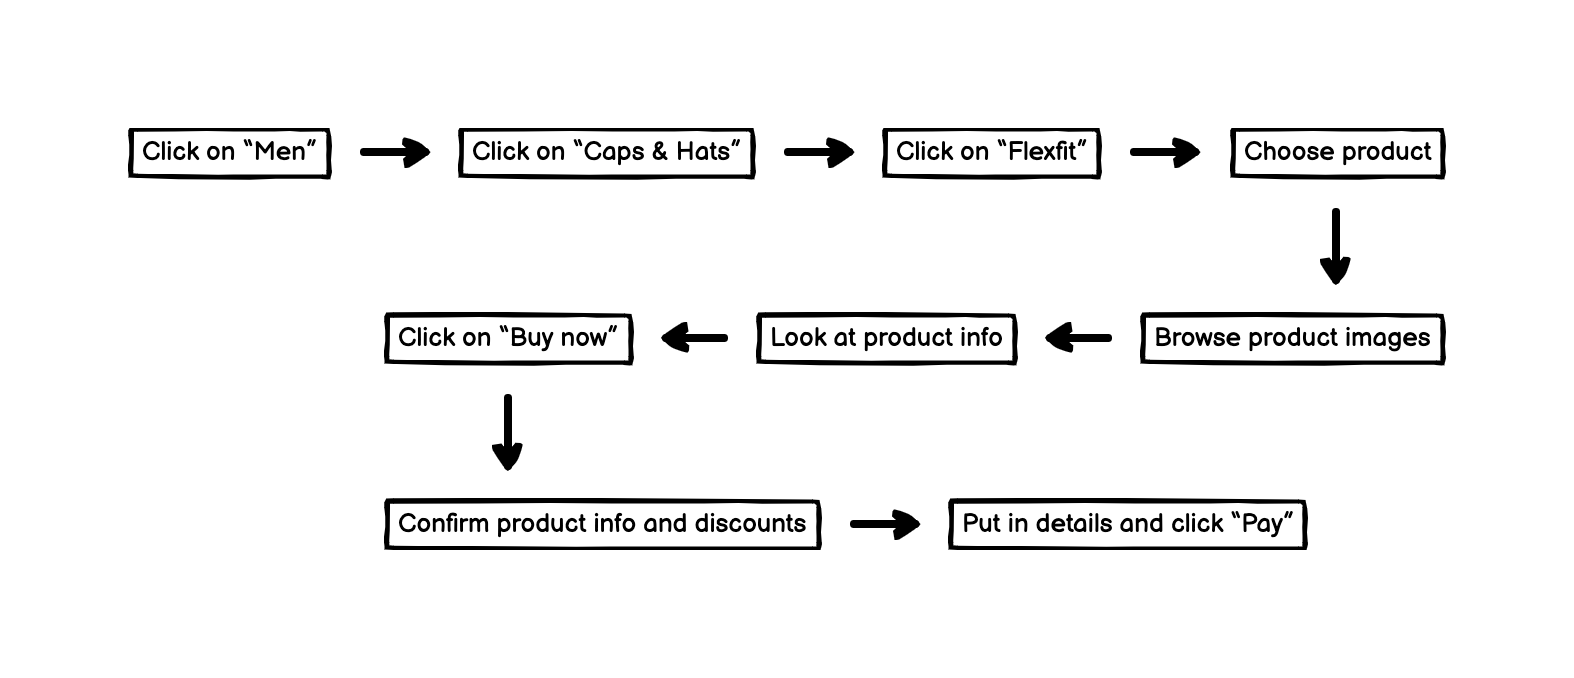
A flowchart (‘user journey map’) storyboarding a user’s ideal purchasing experience.
3. Card sorting
Participatory design research includes card sorting, which helps you design clear navigations.
Why do card sorting?
Card sorting studies help you understand how to categorize and label navigation items in a way that makes sense to users. This is particularly useful for large navigations with many categories and/or navigation items, such as those you’d find on eCommerce websites with many product categories.
When to do card sorting
You should conduct a card sorting study when:
- Starting a new UX project with a large navigation
- Session recordings show users stalling at the navigation
- Analytics show users bouncing between pages that should have a high ‘time-on-page’ without spending a lot of time on them (this suggests that the page content didn’t meet expectations)
- Tree testing confirms that users aren’t able to find key pages
How to do card sorting
To start, you’ll want a card-sorting tool — this exercise doesn’t have to involve pen and paper. If you’re already doing UX research using a UX research tool suite such as UXtweak, Useberry, or Maze, then you already have a card-sorting tool!
Next, write a short, clear description of what each page/screen does/contains without trying to label them yourself:
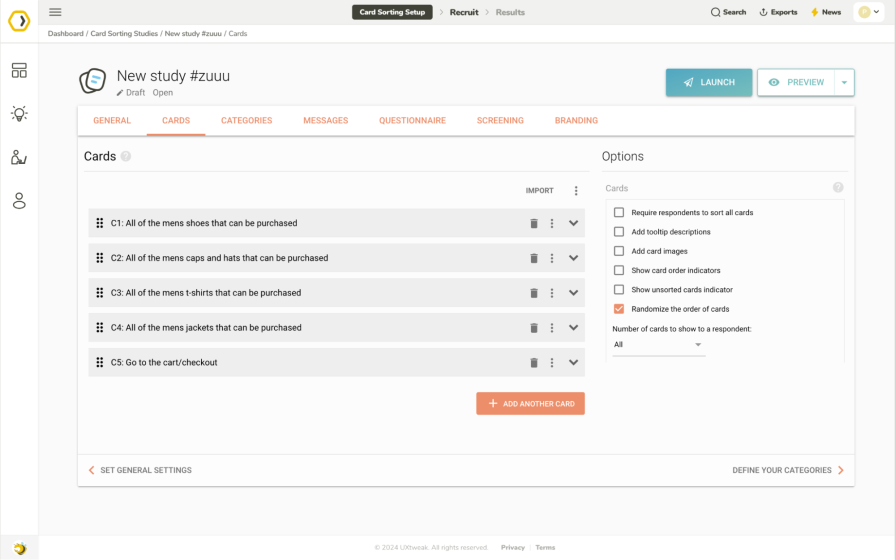
Describing what each page does using UXtweak’s card sorting tool.
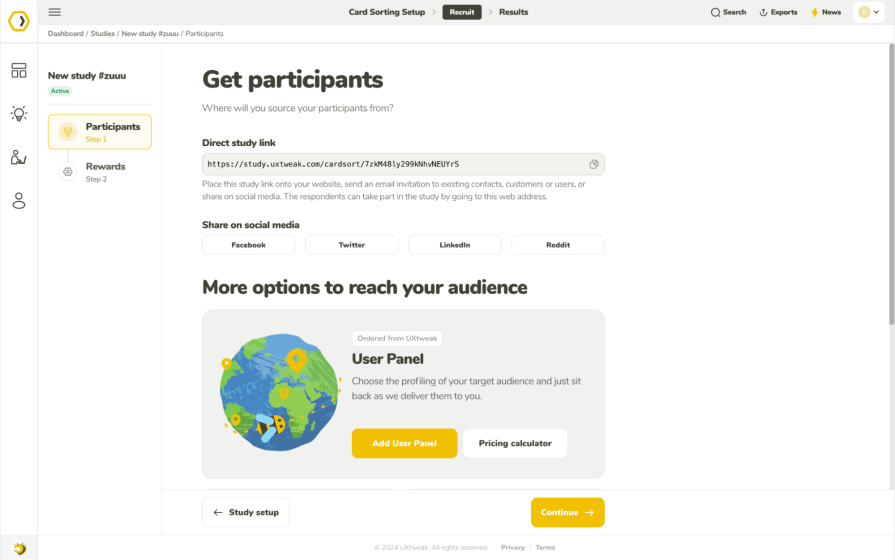
After that, send participants the link to the card-sorting exercise:
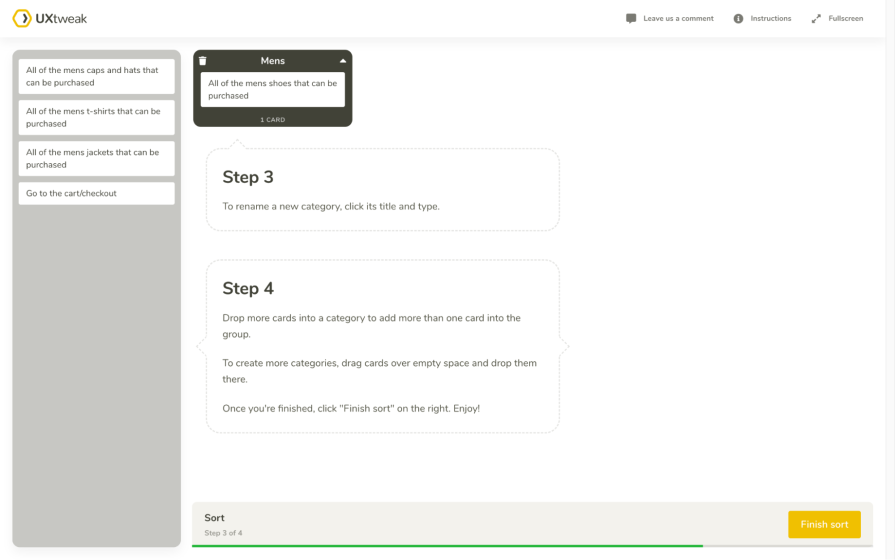
Participants will then label the navigation items, sort them into navigation categories, and also label the navigation categories. It’s a very simple exercise, but your card sorting tool of choice should walk participants through the exercise either way:
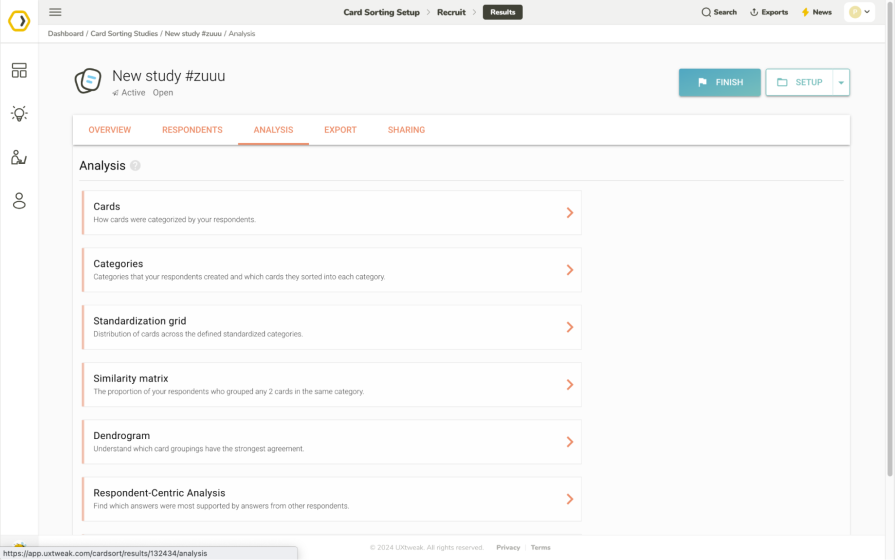
Finally, map the navigation according to the card sorting results, which your card sorting tool of choice should synthesize in various intelligent ways so that you don’t have to do the heavy lifting:
This concludes what’s called open card sorting, which is a type of formative UX research. You can call it a day at this point, or you can follow up with what’s called closed card sorting, which is a type of summative UX research.
With closed card sorting, the navigation items and categories are obviously labeled already, and participants will simply need to put the navigation items into what they believe are the right categories. Closed card sorting is more of a test than a study since you’ll be hoping to see high success rates and if iterating over time, faster completions:
Conclusion
In a nutshell, it’s often more efficient to ask users to directly show you what they want instead of trying to figure it out based on clues from quantitative or qualitative data.
Figuring it out yourself, even using insights acquired via quantitative or qualitative research, will almost certainly cost more time and money. Plus, you’d still need to validate any assumptions anyway, so when it comes to planning user flows, designing navigations, or designing anything really, having users show you what they want directly/via participatory design exercises will likely be the most time-effective and most cost-effective approach.
Just remember that participants should be your target audience — non-users if you’re hoping to acquire new users and existing users (even if they’ve become accustomed to an inefficient experience) if your product strategy is more focused on user retention.
If you have any questions or some participatory design research tips of your own to share, please use the comment section below, and thanks for reading of course!