Managing route configurations in Vue.js applications can quickly become tedious and time-consuming, especially as your app grows and becomes more complex. This is because it involves a lot of repetitive code, making the codebase harder to navigate. Plus, you have to constantly update the routes.js file whenever you create, edit, or remove routes, which can lead to errors and incorrect paths.

One way to avoid these problems is by using file-based routing. This is a system where the routes in your application are automatically determined by the files and folders in your project, rather than by manually setting them up in a configuration file. Unfortunately, this feature is mostly available in meta-frameworks like Nuxt.
However, there are Vue Router plugins that bring similar features to Vue.js. One such plugin is unplugin-vue-router, which offers automatic route generation and easier navigation, among other benefits.
In this article, I’ll show you how automatic file-based routing works, how to set it up in a Vue.js application, and how it compares to traditional routing methods.
How automatic file-based routing works in Vue
The idea of automatic file-based routing is simpler than it sounds. The system works by looking at a specific folder (often called the routes directory) for files with certain extensions, like .vue, and then automatically creates the matching routes based on the file names, ignoring the .vue part. For example:
http://localhost:5173/about
This means all you have to do is add a .vue component to the folder, and the system will handle the rest of the routing for you.
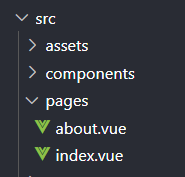
To make this clearer, let’s imagine a project with a specific folder structure where the pages folder serves as the routes directory, which is common in many modern frameworks:
src/pages/
├── index.vue
├── about.vue
└── users/
    └── index.vue
Routes are created for every file that ends with the .vue extension and for any folder that contains an index.vue file. The index.vue file acts as the default content for that route, meaning it’s what users will see when they visit the route.
For example, the index.vue file in the main pages folder will map to the root path (/) also known as “Hompage”, while the about.vue file will map to the /about path, and the same goes for the /user path.
Getting started
To demonstrate how automatic file-based routing works, we’ll need a Vue project. If you don’t have one set up, you can create a new Vue application by running the following command in your computer’s command line tool:
npm create vue@latest
The command will prompt you to choose your preferences for the application, and the following should suffice:
✔ Project name: … <vue-project>
✔ Add TypeScript? … No / Yes
✔ Add JSX Support? … No / Yes
✔ Add Vue Router for Single Page Application development? … No / Yes
✔ Add Pinia for state management? … No / Yes
✔ Add Vitest for Unit testing? … No / Yes
✔ Add an End-to-End Testing Solution? … No / Cypress / Nightwatch / Playwri..
✔ Add ESLint for code quality? … No / Yes
✔ Add Prettier for code formatting? … No / Yes
✔ Add Vue DevTools 7 extension for debugging? (experimental) … No / Yes
After successfully installing the application, cd into the project’s directory and install the necessary dependencies using the following command:
npm i && npm i -D unplugin-vue-router
This command will install everything needed for the Vue application, including the unplugin-vue-router library. With the installation done, the next step is to set up unplugin-vue-router in our project.
Setting up unplugin-vue-router
Before we can start using automatic file-based routing in our application, we first need to plug unplugin-vue-router into the application’s routing system and adjust the project’s structure to fit this routing method.
As a first step, open the vite.config.ts file in your project’s root folder, and add the plugin to your bundler configuration:
import VueRouter from 'unplugin-vue-router/vite'
export default defineConfig({
  plugins: [
    VueRouter({
      /* options */
    }),
    Vue(),
  ],
})
Make sure VueRouter is placed at index 0, that is before Vue.
Next, we’ll update some configurations to ensure autocomplete and error detection work correctly in our application. To do this, open the tsconfig.json file in your project’s main folder and add the following code:
{
  "include": [
    // other files...
    "./typed-router.d.ts"
  ],
  "compilerOptions": {
    // ...
    "moduleResolution": "Bundler",
    "types": ["unplugin-vue-router/client"]
    // ...
  },
  "references": [
    {
      "path": "./tsconfig.node.json"
    },
    {
      "path": "./tsconfig.app.json"
    }
  ]
}
The typed-router.d.ts file helps unplugin keep track of all the routes and paths, allowing TypeScript to offer auto-completion and handle module imports correctly.
Note that the config file expects the typed-router.d.ts file to be present within the root directory. It’s usually created automatically when you start the development server after adding vueRouter to the configuration file. If you don’t see it in the root folder, try starting the development server to generate it.
After that, update the env.d.ts file to make sure your IDE finds the necessary files for your project:
/// <reference types="vite/client" />
/// <reference types="unplugin-vue-router/client" />
Next we’ll override the default router. To do this, go to the src/router and update the index.vue file with the following code:
import { createRouter, createWebHistory } from 'vue-router'
import { routes } from 'vue-router/auto-routes'
const router = createRouter({
  history: createWebHistory(import.meta.env.BASE_URL),
  routes
})
export default router
Here, instead of manually creating a route array and defining routes, unplugin is doing that auto-magically and passing it directly to the router instance.
Finally, rename the view folder to pages, and change the AboutView.vue and HomeView.vue files inside it to about.vue<strong> and </strong>index.vue<strong>, respectively.
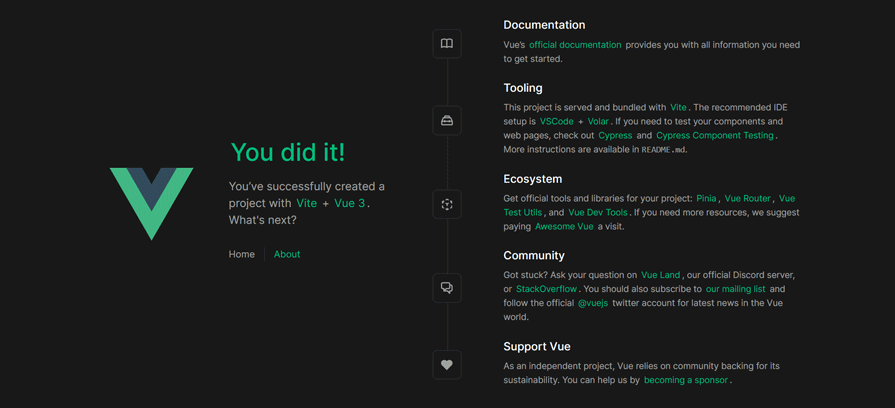
That’s it! You’ve successfully added unplugin to your project and set up automatic file-based routing. If everything is set up correctly, you should be able to navigate to any page in the pages directory. Check out the GIF below to see it in action:
Migrating existing projects
When migrating an existing application to use automatic file-based routing, you pretty much have to follow the steps highlighted in the previous sections, that is: set up the router configuration to use auto-generated routes provided by unplug-vue-router, define your file structure under the pages directory, and add necessary type definitions using the typed-router.d.ts file.
You might also need to update any code that relies on specific routes. Don’t worry, — you won’t need to change how you use RouterView and RouterLink for displaying and navigating between pages; they will continue to work as they did before:
     <nav>
        <RouterLink to="/">Home</RouterLink>
        <RouterLink to="/about">About</RouterLink>
        <RouterLink to="/blog">Blog</RouterLink>
      </nav>
  <RouterView />
However, for some features, like routes that change based on user input (dynamic routes) or routes within other routes (nested routes), you’ll need to use different methods.
Dynamic routes
Unlike traditional routing methods, creating dynamic routes in file-based systems follows specific conventions. For instance, you can use special filenames, like [id].vue or [slug].vue, to create dynamic parts of a URL, such as blog/123 or store/123. The matching component will be displayed based on the value in the URL.
The file structure would look like this:
 src/
├── pages/
├── users/
│   └── [id].vue    // Maps to to '/users/:id'
├── blog/
│   └── [slug].vue  // Maps to '/blog/:slug'
└── index.vue           // Maps to '/'
Although it happens under the hood, unplugin-vue-router will generate the route configuration for you based on the dynamic routes from the file structure above:
  const routes = [
  { path: '/users/:id', component: () => import('./pages/users/[id].vue') },
  { path: '/blog/:slug', component: () => import('./pages/blog/[slug].vue') },
  { path: '/', component: () => import('./pages/index.vue') },
];
Data-driven dynamic routing
The best way to demonstrate dynamic routing is to combine it with external data and dynamically generate routes based on fetched information. We’ll create a /store route in our sample application and dynamically generate routes for products based on data fetched from an API.
Start by adding the /store route to your app. After making this update, your file structure should look like this:
 src/
├── pages/
├── /* Other routes */
├── store/
│   ├── index.vue
│   └── [id].vue
Next, add the following code in the corresponding index.vue file:
import { ref, onMounted } from 'vue'
import type { IProduct } from '@/types'
export default {
  setup() {
      const products = ref<IProduct[]>([])
    const regex = /[^a-z0-9A-Z-://.]/g
    const fetchProduct = async () => {
      try {
        const res = await fetch('https://api.escuelajs.co/api/v1/products')
        if (!res.ok) throw new Error('failed to fetch posts')
        products.value = await res.json()
      } catch (error) {
        console.log(error)
      }
    }
    onMounted(() => {
      fetchPosts()
    })
    return {
      products,
      regex
    }
  }
}
</script>
<template>
  <div class="about">
    <h1>/Store</h1>
    <div>
      <ul>
        <li v-for="item in products" :key="item.id">
          <router-link :to="`/store/${item.id}`">
            <div class="card">
              <img class="card_image" :src="item.images[0].replace(regex, '')" :alt="item.title" />
              <div class="info">
                <p class="title">{{ item.title.substring(0, 25) + '...' }}</p>
                <p class="price">${{ item.price }}</p>
              </div>
            </div>
          </router-link>
        </li>
      </ul>
    </div>
  </div>
</template>
<style>
@media (min-width: 1024px) {
  .about {
    min-height: 100vh;
    align-items: center;
  }
  li {
    list-style-type: none;
  }
  .card_image {
    width: 80px;
    margin-right: 10px;
  }
  .card {
    display: flex;
    align-items: flex-start;
    border: #00bd7e solid 2px;
    padding: 20px;
  }
  .title {
    font-size: 20px;
    color: white;
  }
  .info {
    display: flex;
    flex-direction: column;
    align-items: flex-start;
    justify-content: space-between;
    height: 80px;
  }
  .price {
    font-size: 20px;
    color: white;
    background-color: #00bd7e;
    padding: 2px 10px;
    border-radius: 10px;
  }
}
</style>
Here’s what’s happening: we’re using a function called fetchProducts to get the product data when the component first loads. This is done using the onMounted hook, so the data is ready when the component mounts, and it gets stored in the products array.
In the template structure, we loop through the products array and display each item in a list: li. The router-link component creates dynamic links to the details page for each product using its id.
Your /store route should look something like this GIF:

When a product card is clicked, the id in the URL (dynamic segment) is replaced by the actual id of the product. This id then becomes accessible in the route’s parameter object.
Now that we have access to the product’s id, we can fetch and display details for that product on a new page (dynamic route). To set this up, open the [id].vue file and add the following code:
<script lang="ts">
import { onMounted, ref } from 'vue'
import { useRoute } from 'vue-router/auto'
import type { IItem } from '@/types'
export default {
  setup() {
    const route = useRoute()
    const item = ref<IItem>()
    const regex = /[^a-z0-9A-Z-://.]/g
    const fetchItem = async (id: any) => {
      try {
        const res = await fetch(`https://api.escuelajs.co/api/v1/products/${id}`)
        if (!res.ok) throw new Error('Failed to fetch post')
        item.value = await res.json()
      } catch (error) {
        console.log('Error:' + error)
      }
    }
    onMounted(() => {
      const { id } = route.params
      fetchItem(id)
    })
    return {
      item,
      regex
    }
  }
}
</script>
<template>
  <div v-if="item">
    <h1>{{ item.title }}</h1>
    <p>{{ item.description }}</p>
    <div class="img">
      <img :src="item.images[0].replace(regex, '')" :alt="item.title" />
    </div>
  </div>
  <div v-else>
    <p>...Loading</p>
  </div>
</template>
<style>
p {
  margin-bottom: 15px;
  place-items: center;
}
img {
  width: 100%;
}
.img {
  width: 400px;
  margin-left: auto;
  margin-right: auto;
}
</style>
In this code, we’re essentially following the same process as before, but now we’re dynamically appending the product’s id to fetch its specific data. With this setup, the dynamic routes in your application should now work as expected.
Nested routes
Nested routes in a file-based routing system are straightforward because nested routes are automatically generated based on the structure of subdirectories within the pages folder. For example, the [id].vue file in the previous example represents a nested route and can be refactored as follows:
 src/
├── pages/
├── /* Other routes */
├── store/
│   ├── index.vue
│   └── [id]/
│     └── index.vue
Unplugin makes creating nested routes super easy, as evident in the example above. All you need to do is create the necessary subdirectories to define your nested routes, and the plugin takes care of the rest for you.
This approach is significantly more straightforward compared to the conventional method of using a route configuration with Vue Router, which, as shown in the excerpt below, can quickly become unnecessarily complex and difficult to manage:
{
  path: 'store',
  component: () => import('../pages/store/index.vue'),
  children: [
  {
    path: ':id',
    component: () => import('../pages/store/[id].vue'),
  },
}
Nested dynamic routes
Where I think a file-based routing system really shines is when working with nested dynamic routes. These are dynamic routes that include nested paths, rendered dynamically alongside a parent dynamic route.
For instance, if we want to dynamically generate a /settings route for each item in our store, we simply need to nest a settings.vue file within the [id]/ directory, alongside the index.vue file:
 src/
├── pages/
├── /* Other routes */
├── store/
│   ├── index.vue
│   └── [id]/
│     ├── index.vue
│     └── settings.vue
Compare that to the conventional method, which would require you create a route config similar to the following:
const routes = [
  {
    path: '/store',
    component: () => import('@/pages/store/index.vue'),
    children: [
      {
        path: ':id',
        component: () => import('@/pages/store/[id]/index.vue'),
        children: [
          {
            path: 'settings',
            component: () => import('@/pages/store/[id]/settings.vue'),
          },
        ],
      },
    ],
  },
]
Nested routes without nesting layouts
If nesting route files within a parent route is not suitable for your use case, unplugin offers an alternative method to create nested routes without using a parent-child directory structure.
You can do this by appending the parent route’s name to the child route’s filename. For example, to create a /store/categories route, instead of placing a categories.vue file inside the store directory like so:
 src/
├── pages/
├── /* Other routes */
├── store/
│   ├── index.vue
│   ├── [id].vue
│   └── categories.vue
You can simply add it to the pages root directory and append store. to file name:
 src/
├── pages/
├── /* Other routes */
├── store/
│   ├── index.vue
│   └── [id].vue
└── store.categories.vue
This file structure will map to the /pages/store/categories route. The . between the parent and child route names will be automatically converted to / when generating the routes:
const routes = [
  {
    path: '/store',
    component: () => import('@/pages/store/index.vue'),
    children: [
      {
     path: ':id',
       component: () => import('@/pages/store/[id]/index.vue'),
}
    ],
  },
  {
    path: '/store/categories',
    component: () => import('@/pages/store.categories.vue'),
  },
]
Catch-All […all] route
The catch-all route is an essential path used to handle requests that don’t match any other routes in the generated route configuration. Think of a user attempting to access a non-existent route like pages/blog in our sample app; they would encounter a blank page, which can be confusing.
However, with the catch-all route, we can redirect users to a 404 page, informing them that they are trying to access a non-existent route.
Traditionally, catch-all routes are defined with route path such as /* or * and are typically placed last in the route configuration array, as Vue Router matches routes in the order they are defined:
const routes = [
  {
    path: '/',
    name: 'Home',
    component: Home,
  },
  {
    path: '/about',
    name: 'About',
    component: About,
  },
  // Catch-all route (404 page)
  {
    path: '/:pathMatch(.*)*', // This pattern matches all undefined paths
    name: 'NotFound',
    component: NotFound,
  },
];
However, with file-based routing, we don’t have to adhere to these rules, and creating a catch-all route is as easy as creating a file with three dots prepended to a parameter name, e.g. [...path].vue:
 src/
├── pages/
├── /* Other routes */
├── [...all].vue
├── store/
│   ├── index.vue
│   └── [id].vue
This will match any non-existent route.
Note that this can also be done within folders to handle non-existent nested route navigation, e.g. pages/store/[...path].vue:
 src/
├── pages/
├── /* Other routes */
├── [...all].vue
├── store/
│   ├── index.vue
│   ├── [id].vue
│   └── [...all].vue
Advanced configurations with the VueRouter function
We’ve been using the default configuration of unplugin so far. However, the plugin also allows for more advanced setups through the VueRouter function, which we previously used to create the router instance in our application’s bundler:
import VueRouter from 'unplugin-vue-router/vite'
export default defineConfig({
  plugins: [
    VueRouter({
      /* options */
    }),
     ...
  ],
})
The function accepts an object parameter which we can use to define a variety of advanced configurations. These include the below.
Custom route folder
The unplugin-vue-router allows you to specify a custom directory for your routes, instead of using the default src/pages directory. This feature is particularly useful if you want to organize your routes into separate modules or namespaces.
To set this up, define the routesFolder option in the VueRouter object, and pass the path to your custom route folder as a string:
export default defineConfig({
  plugins: [
    VueRouter({
      routesFolder: 'src/views'
    }),
     ...
  ],
})
This change will set the src/views directory as the new route folder, meaning that all route files within this folder will be rendered instead of those in the default src/pages directory.
Multiple route folders
Unplugin also allows you to define multiple route folders. This can be done by passing an array of multiple path strings to the routesFolder option instead of a single path as we did in the previous section:
export default defineConfig({
  plugins: [
    VueRouter({
      routesFolder: ['src/views', 'src/views']
    }),
     ...
  ],
})
This setup will make both the views and pages directories serve as route folders, allowing you to manage routes from multiple locations within your project.
This can be especially useful for large-scale applications and when you want to separate concerns within your application, such as having different route structures for user-facing pages, admin panels, and blog sections.
Custom extensions
Another advanced feature of the plugin is custom extensions. This allows you to specify custom extensions you want to treat as pages. For example, if you want to use markdown files as pages, it would make sense to configure unplugin to generate empty paths for files with the .md extension.
This can be done by using the extension option in the VueRouter object to add an array of file extensions you want the plugin to recognize:
VueRouter({
  // globally set the extensions
  extensions: ['.vue', '.md'],
})
With this configuration, unplugin will create empty routes for every file with the .vue and .md extensions in the specified route folders.
Conclusion
Automatic file-based routing can greatly enhance your development experience. Its easy integration and straightforward setup make it simple to learn and use.
While this guide covers the basics, there are more advanced features you can explore on your own. The best place to start is the unplugin-vue-router documentation.