
Building full-stack apps can be tough. You have to think about frontend, APIs, databases, auth – plus you have to know how all of these things work together.
And building a project like a video conferencing app from scratch can feel even more overwhelming, especially with the complexities of managing video streams, user auth, and real-time interactions.
But what if I told you there’s an easier way to do this – one that lets you build your video conferencing app in a fraction of the time?
In this article, I’ll show you how I built a video conferencing app using Stream and Clerk in Next.js.
Here is the source code (remember to give it a star ⭐).
Before we start, let me tell you why I wrote this tutorial.
I’m a Software Engineer who cares about writing and I love to code, design, develop, and then teach people.
I've been using open-source projects, products, and services for a while now, and contributing to many of them to improve them how I can. Last month I built an open-source blog for “awesome developer tools“ called - devtoolsacademy
This article is about sharing the experience I’ve had using yet another awesome developer tool.
Table of Contents:
What is Stream?
Prerequisites
How to Build the App Interface with Next.js
The Create Link Modal
The Instant Meeting Modal
The Join Meeting Modal
How to Authenticate Users with Clerk
How to Set Up Stream in a Next.js app
How to Create and Join Calls with Stream
Creating and Scheduling calls
Joining calls and the Meeting Page
Retrieving Upcoming Calls
Next Steps
What is Stream?
Stream is an open-source cloud-based platform that provides APIs and SDKs for building scalable and feature-rich real-time applications. It offers pre-built UI components for creating enterprise-grade software apps with features like chat, video, audio, and activity feeds.
Here's how I'll use Stream while building the app:
Set up real-time video and audio calls
Use Stream's UI components to quickly build the interface
Implement key features like
videoandaudiocallsCall Types– I'll implement instant meetings and pre-scheduled calls using StreamLeverage Stream's call and participant objects to manage
call state
Prerequisites
To fully understand the tutorial, you need to have a basic understanding of React and Next.js. You’ll also need the following:
Stream React SDK - provides pre-built UI components for adding video call features quickly.
Stream Node.js SDK - for managing server-side interactions and keeping Stream's state in sync.
Clerk - a comprehensive user management platform to handle authentication effortlessly.
Headless UI - provides accessible UI components for building user-friendly applications.
React Copy-to-Clipboard - allows users to easily copy meeting links within the app.
React Icons - offers a library of easily integrated icons.
How to Build the App Interface with Next.js
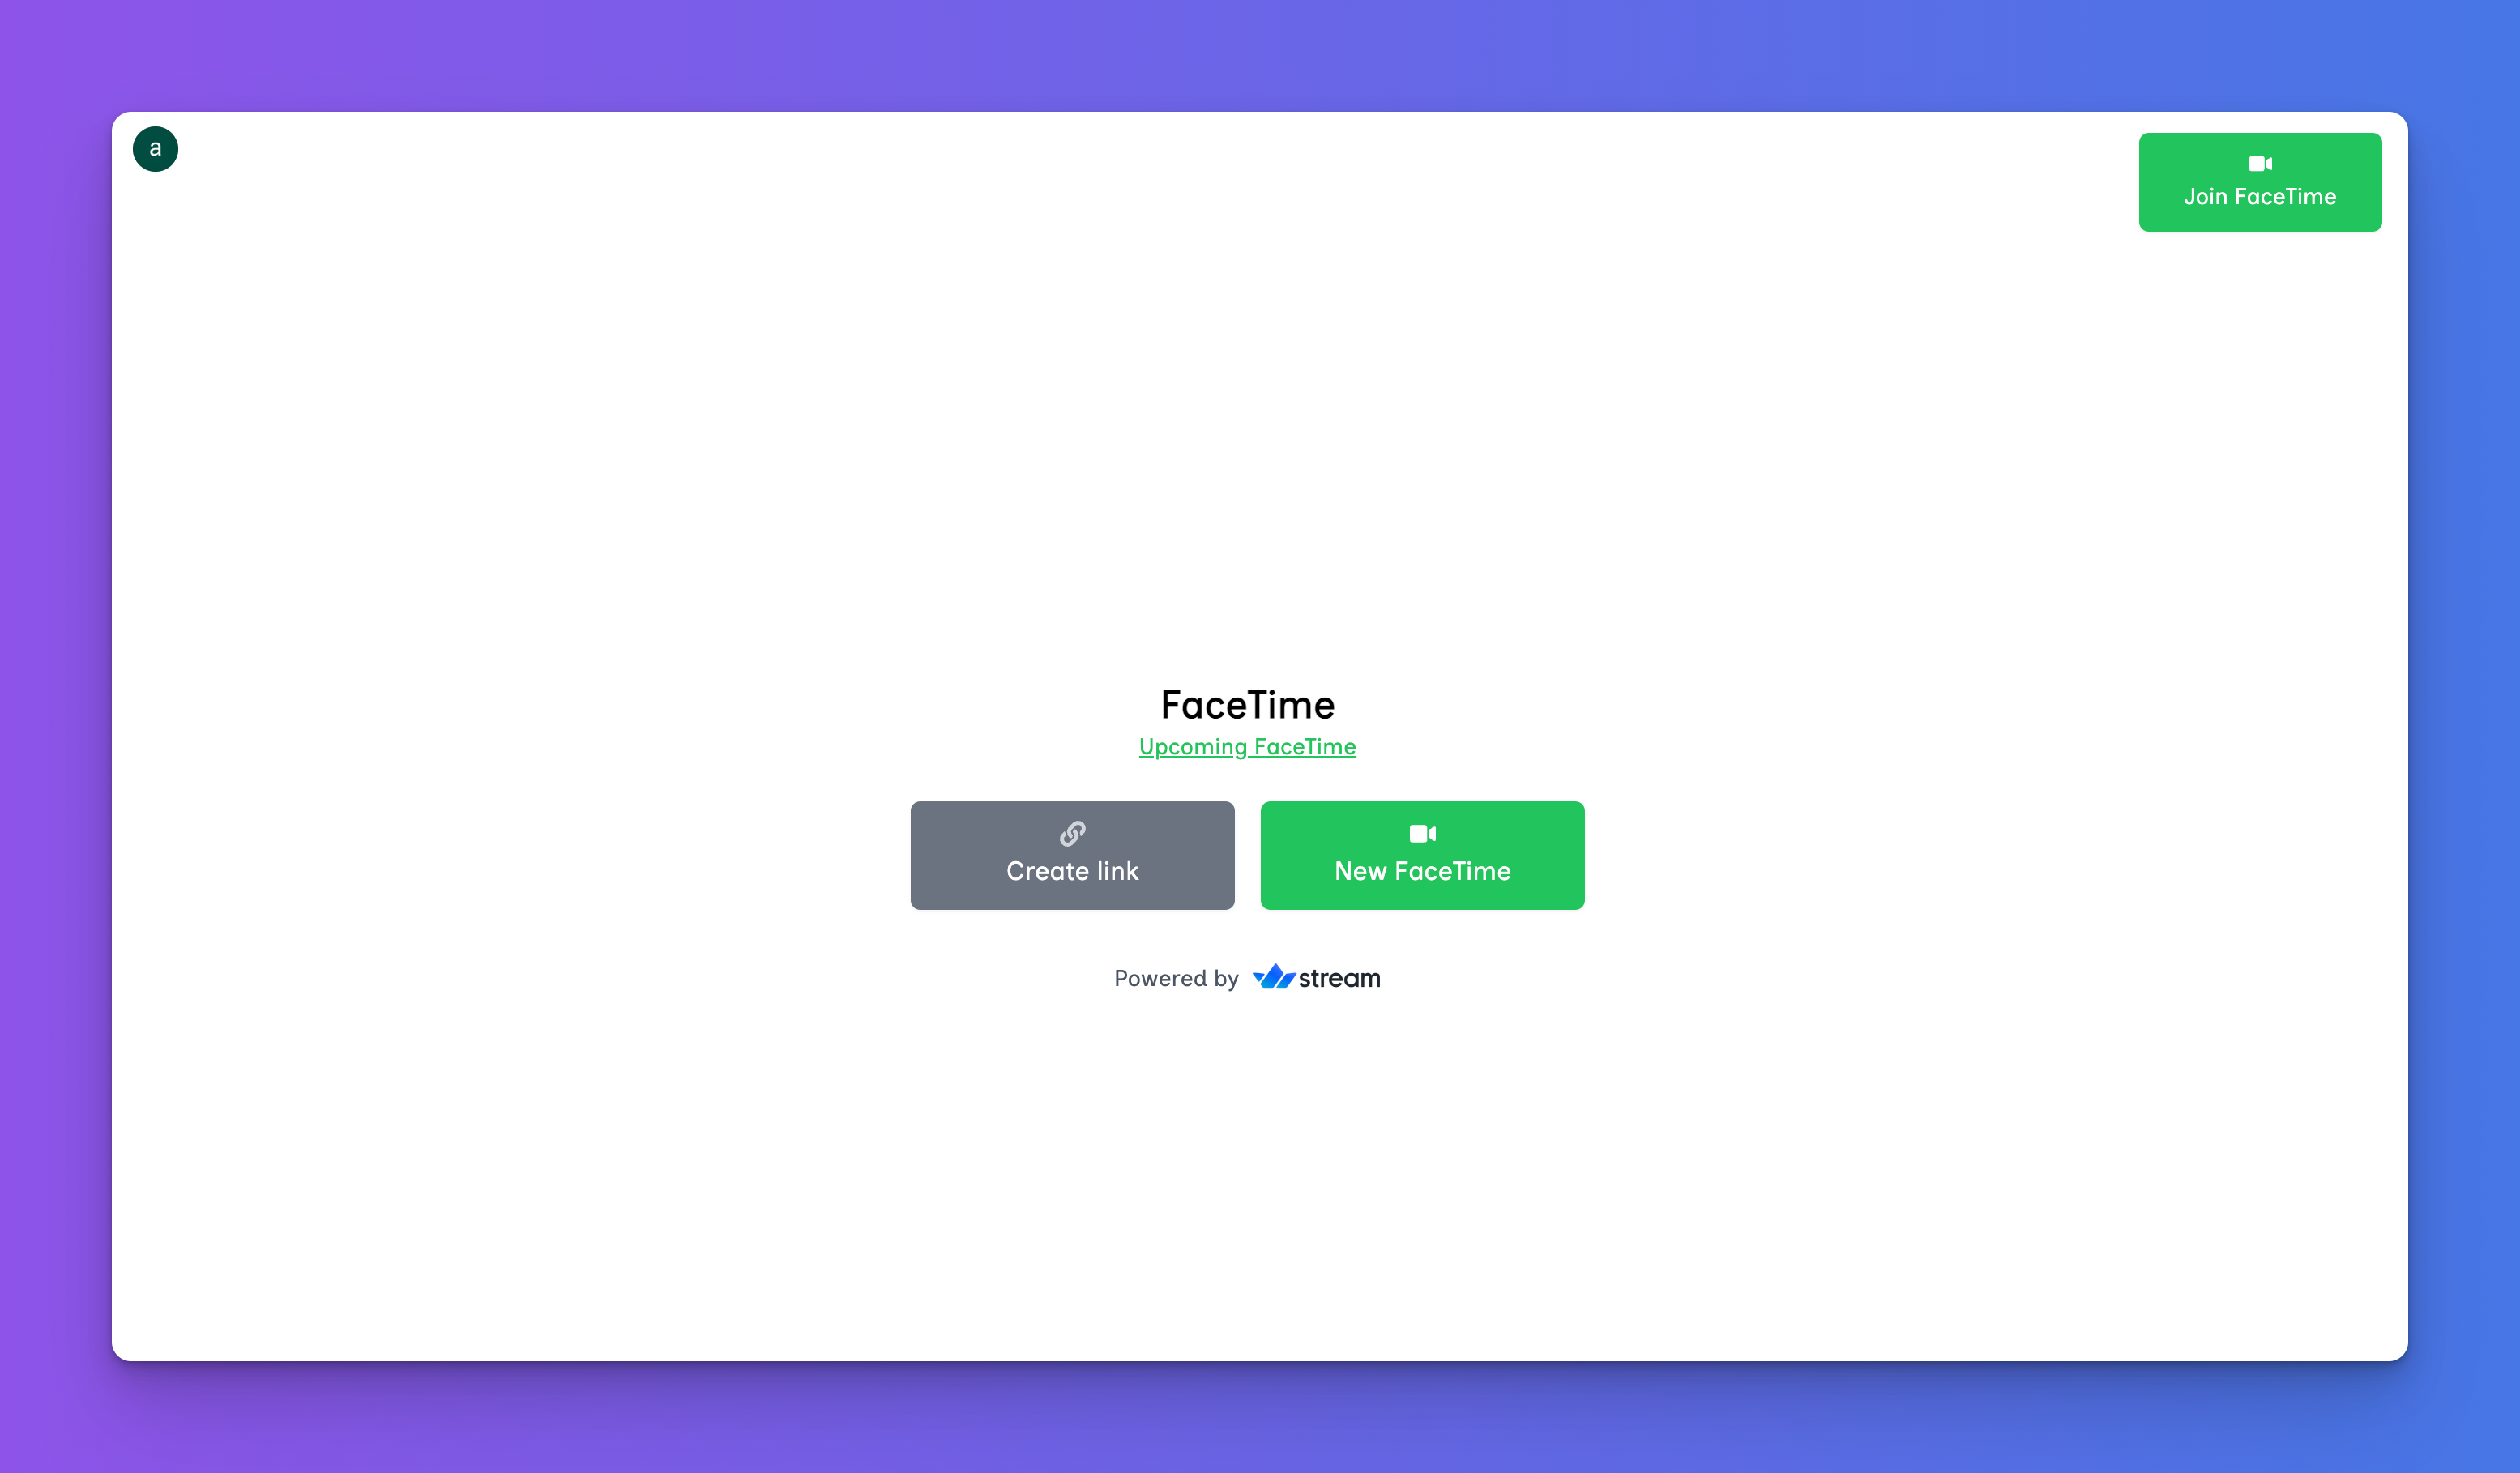
In this section, I'll guide you through creating the user interface for the video-conferencing app. The interface will allow users to easily create, join, and schedule meetings, as well as view their upcoming meetings.
First, let’s create a Next.js TypeScript project by running the code snippet below:
npx create-next-app facetime-app
Then install the following packages:
React icons - a popular React icons package
Headless UI - provides a set of accessible UI components
React-copy-to-clipboard - a lightweight package that enables us to copy meeting links.
npm install react-icons @headlessui/react react-copy-to-clipboard
Copy the code snippet below into the app/page.tsx file:
"use client";
import { useState } from "react";
import { FaLink, FaVideo } from "react-icons/fa";
import InstantMeeting from "@/app/modals/InstantMeeting";
import UpcomingMeeting from "@/app/modals/UpcomingMeeting";
import CreateLink from "@/app/modals/CreateLink";
import JoinMeeting from "@/app/modals/JoinMeeting";
export default function Dashboard() {
    const [startInstantMeeting, setStartInstantMeeting] =
        useState<boolean>(false);
    const [joinMeeting, setJoinMeeting] = useState<boolean>(false);
    const [showUpcomingMeetings, setShowUpcomingMeetings] =
        useState<boolean>(false);
    const [showCreateLink, setShowCreateLink] = useState<boolean>(false);
    return (
        <>
            <button
                className=' top-5 right-5 text-sm fixed bg-green-500 px-2 w-[150px] hover:bg-green-600 py-3 flex flex-col items-center text-white rounded-md shadow-sm cursor-pointer z-10'
                onClick={() => setJoinMeeting(true)}
            >
                <FaVideo className='mb-[3px] text-white' />
                Join FaceTime
            </button>
            <main className='w-full h-screen flex flex-col items-center justify-center'>
                <h1 className='font-bold text-2xl text-center'>FaceTime</h1>
                <div className='flex flex-col'>
                    <button
                        className='text-green-500 underline text-sm text-center cursor-pointer'
                        onClick={() => setShowUpcomingMeetings(true)}
                    >
                        Upcoming FaceTime
                    </button>
                </div>
                <div className='flex items-center justify-center space-x-4 mt-6'>
                    <button
                        className='bg-gray-500 px-4 w-[200px] py-3 flex flex-col items-center hover:bg-gray-600 text-white rounded-md shadow-sm'
                        onClick={() => setShowCreateLink(true)}
                    >
                        <FaLink className='mb-[3px] text-gray-300' />
                        Create link
                    </button>
                    <button
                        className='bg-green-500 px-4 w-[200px] hover:bg-green-600 py-3 flex flex-col items-center text-white rounded-md shadow-sm'
                        onClick={() => setStartInstantMeeting(true)}
                    >
                        <FaVideo className='mb-[3px] text-white' />
                        New FaceTime
                    </button>
                </div>
            </main>
            {startInstantMeeting && (
                <InstantMeeting
                    enable={startInstantMeeting}
                    setEnable={setStartInstantMeeting}
                />
            )}
            {showUpcomingMeetings && (
                <UpcomingMeeting
                    enable={showUpcomingMeetings}
                    setEnable={setShowUpcomingMeetings}
                />
            )}
            {showCreateLink && (
                <CreateLink enable={showCreateLink} setEnable={setShowCreateLink} />
            )}
            {joinMeeting && (
                <JoinMeeting enable={joinMeeting} setEnable={setJoinMeeting} />
            )}
        </>
    );
}
The code snippet above renders multiple buttons that allow users to perform actions like joining, creating, and scheduling a call. Each button opens a modal that prompts the user to provide additional details specific to the action they are performing.
Next, let’s create a modals folder within the Next.js app directory and add the following components to the modals folder:
cd app
mkdir modals && cd modals
touch CreateLink.tsx InstantMeeting.tsx JoinMeeting.tsx UpcomingMeeting.tsx
The CreateLink modal allows users to provide a description and schedule a time for the call. The InstantMeeting modal lets users start an instant meeting by providing a call description. The JoinMeeting modal enables users to enter a call link and join a meeting. And the UpcomingMeeting modal displays all scheduled upcoming calls.
The Create Link Modal
Copy the code snippet below into the CreateLink modal:
"use client";
import {
    Dialog,
    DialogTitle,
    DialogPanel,
    Transition,
    Description,
    TransitionChild,
} from "@headlessui/react";
import { Fragment, SetStateAction, useState, Dispatch } from "react";
import CopyToClipboard from "react-copy-to-clipboard";
import { FaCopy } from "react-icons/fa";
export default function CreateLink({ enable, setEnable }: Props) {
    const [showMeetingLink, setShowMeetingLink] = useState(false);
    const [facetimeLink, setFacetimeLink] = useState<string>("");
    const closeModal = () => setEnable(false);
    return (
        <>
            <Transition appear show={enable} as={Fragment}>
                <Dialog as='div' className='relative z-10' onClose={closeModal}>
                    <TransitionChild
                        as={Fragment}
                        enter='ease-out duration-300'
                        enterFrom='opacity-0'
                        enterTo='opacity-100'
                        leave='ease-in duration-200'
                        leaveFrom='opacity-100'
                        leaveTo='opacity-0'
                    >
                        <div className='fixed inset-0 bg-black/75' />
                    </TransitionChild>
                    <div className='fixed inset-0 overflow-y-auto'>
                        <div className='flex min-h-full items-center justify-center p-4 text-center'>
                            <TransitionChild
                                as={Fragment}
                                enter='ease-out duration-300'
                                enterFrom='opacity-0 scale-95'
                                enterTo='opacity-100 scale-100'
                                leave='ease-in duration-200'
                                leaveFrom='opacity-100 scale-100'
                                leaveTo='opacity-0 scale-95'
                            >
                                <DialogPanel className='w-full max-w-2xl transform overflow-hidden rounded-2xl bg-white p-6 align-middle shadow-xl transition-all text-center'>
                                    {showMeetingLink ? (
                                        <MeetingLink facetimeLink={facetimeLink} />
                                    ) : (
                                        <MeetingForm
                                            setShowMeetingLink={setShowMeetingLink}
                                            setFacetimeLink={setFacetimeLink}
                                        />
                                    )}
                                </DialogPanel>
                            </TransitionChild>
                        </div>
                    </div>
                </Dialog>
            </Transition>
        </>
    );
}
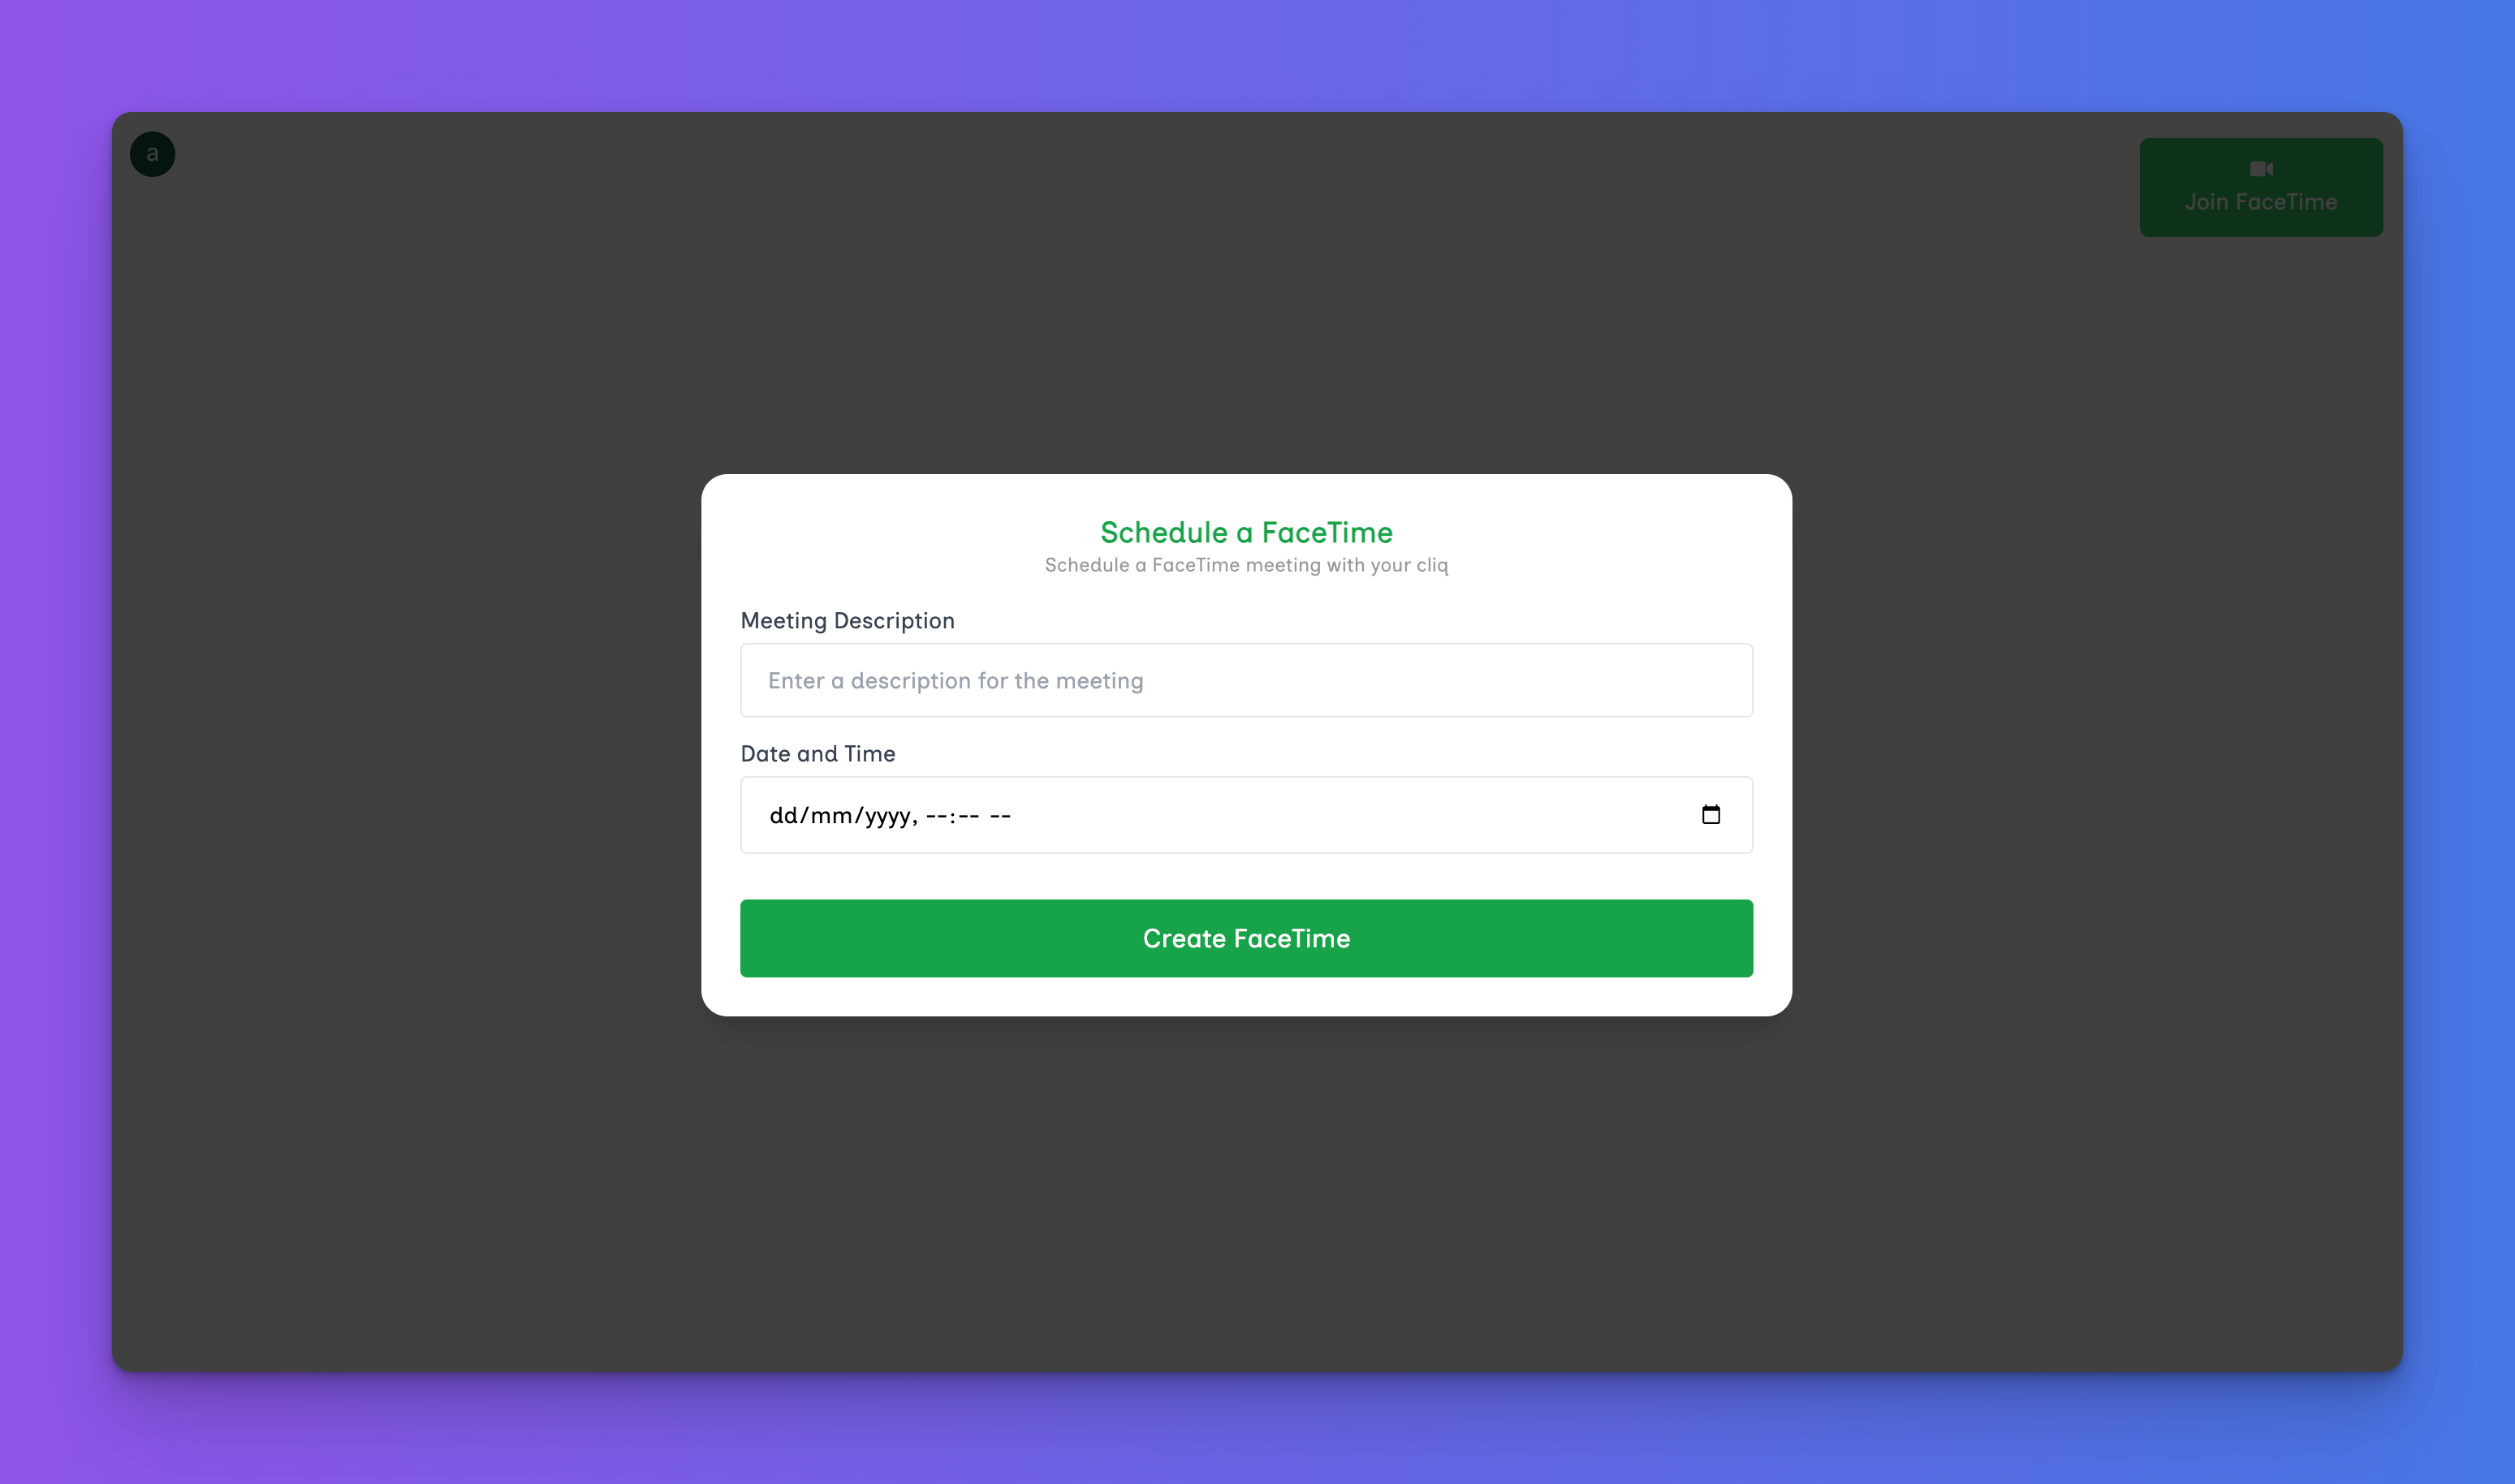
The code snippet above renders a form that allows users to input a description and select a time to schedule a call. Once the call is created, the generated link is displayed and can be copied.
Finally, add the MeetingForm and MeetingLink components below the CreateLink component:
const MeetingForm = ({
    setShowMeetingLink,
    setFacetimeLink,
}: {
    setShowMeetingLink: React.Dispatch<SetStateAction<boolean>>;
    setFacetimeLink: Dispatch<SetStateAction<string>>;
}) => {
    const [description, setDescription] = useState<string>("");
    const [dateTime, setDateTime] = useState<string>("");
    const handleStartMeeting = async (e: React.FormEvent<HTMLFormElement>) => {
        e.preventDefault();
        console.log({ description, dateTime });
    };
    return (
        <>
            <DialogTitle
                as='h3'
                className='text-lg font-bold leading-6 text-green-600'
            >
                Schedule a FaceTime
            </DialogTitle>
            <Description className='text-xs opacity-40 mb-4'>
                Schedule a FaceTime meeting with your cliq
            </Description>
            <form className='w-full' onSubmit={handleStartMeeting}>
                <label
                    className='block text-left text-sm font-medium text-gray-700'
                    htmlFor='description'
                >
                    Meeting Description
                </label>
                <input
                    type='text'
                    name='description'
                    id='description'
                    value={description}
                    onChange={(e) => setDescription(e.target.value)}
                    className='mt-1 block w-full text-sm py-3 px-4 border-gray-200 border-[1px] rounded mb-3'
                    required
                    placeholder='Enter a description for the meeting'
                />
                <label
                    className='block text-left text-sm font-medium text-gray-700'
                    htmlFor='date'
                >
                    Date and Time
                </label>
                <input
                    type='datetime-local'
                    id='date'
                    name='date'
                    required
                    className='mt-1 block w-full text-sm py-3 px-4 border-gray-200 border-[1px] rounded mb-3'
                    value={dateTime}
                    onChange={(e) => setDateTime(e.target.value)}
                />
                <button className='w-full bg-green-600 text-white py-3 rounded mt-4'>
                    Create FaceTime
                </button>
            </form>
        </>
    );
};
The MeetingForm component accepts the call description and scheduled time, while the MeetingLink component displays the generated call link and allows users to copy it.
const MeetingLink = ({ facetimeLink }: { facetimeLink: string }) => {
    const [copied, setCopied] = useState<boolean>(false);
    const handleCopy = () => setCopied(true);
    return (
        <>
            <DialogTitle
                as='h3'
                className='text-lg font-bold leading-6 text-green-600'
            >
                Copy FaceTime Link
            </DialogTitle>
            <Description className='text-xs opacity-40 mb-4'>
                You can share the facetime link with your participants
            </Description>
            <div className='bg-gray-100 p-4 rounded flex items-center justify-between'>
                <p className='text-xs text-gray-500'>
                    {`${process.env.NEXT_PUBLIC_FACETIME_HOST}/${facetimeLink}`}
                </p>
                <CopyToClipboard
                    onCopy={handleCopy}
                    text={`${process.env.NEXT_PUBLIC_FACETIME_HOST}/${facetimeLink}`}
                >
                    <FaCopy className='text-green-600 text-lg cursor-pointer' />
                </CopyToClipboard>
            </div>
            {copied && (
                <p className='text-red-600 text-xs mt-2'>Link copied to clipboard</p>
            )}
        </>
    );
};
The Instant Meeting Modal
Copy the following code snippet into the InstantMeeting modal:
"use client";
import {
    Dialog,
    DialogTitle,
    DialogPanel,
    Transition,
    Description,
    TransitionChild,
} from "@headlessui/react";
import { FaCopy } from "react-icons/fa";
import CopyToClipboard from "react-copy-to-clipboard";
import { Fragment, useState, Dispatch, SetStateAction } from "react";
import { useStreamVideoClient } from "@stream-io/video-react-sdk";
import { useUser } from "@clerk/nextjs";
import Link from "next/link";
export default function InstantMeeting({ enable, setEnable }: Props) {
    const [showMeetingLink, setShowMeetingLink] = useState(false);
    const [facetimeLink, setFacetimeLink] = useState<string>("");
    const closeModal = () => setEnable(false);
    return (
        <>
            <Transition appear show={enable} as={Fragment}>
                <Dialog as='div' className='relative z-10' onClose={closeModal}>
                    <TransitionChild
                        as={Fragment}
                        enter='ease-out duration-300'
                        enterFrom='opacity-0'
                        enterTo='opacity-100'
                        leave='ease-in duration-200'
                        leaveFrom='opacity-100'
                        leaveTo='opacity-0'
                    >
                        <div className='fixed inset-0 bg-black/75' />
                    </TransitionChild>
                    <div className='fixed inset-0 overflow-y-auto'>
                        <div className='flex min-h-full items-center justify-center p-4 text-center'>
                            <TransitionChild
                                as={Fragment}
                                enter='ease-out duration-300'
                                enterFrom='opacity-0 scale-95'
                                enterTo='opacity-100 scale-100'
                                leave='ease-in duration-200'
                                leaveFrom='opacity-100 scale-100'
                                leaveTo='opacity-0 scale-95'
                            >
                                <DialogPanel className='w-full max-w-2xl transform overflow-hidden rounded-2xl bg-white p-6 align-middle shadow-xl transition-all text-center'>
                                    {showMeetingLink ? (
                                        <MeetingLink facetimeLink={facetimeLink} />
                                    ) : (
                                        <MeetingForm
                                            setShowMeetingLink={setShowMeetingLink}
                                            setFacetimeLink={setFacetimeLink}
                                        />
                                    )}
                                </DialogPanel>
                            </TransitionChild>
                        </div>
                    </div>
                </Dialog>
            </Transition>
        </>
    );
}
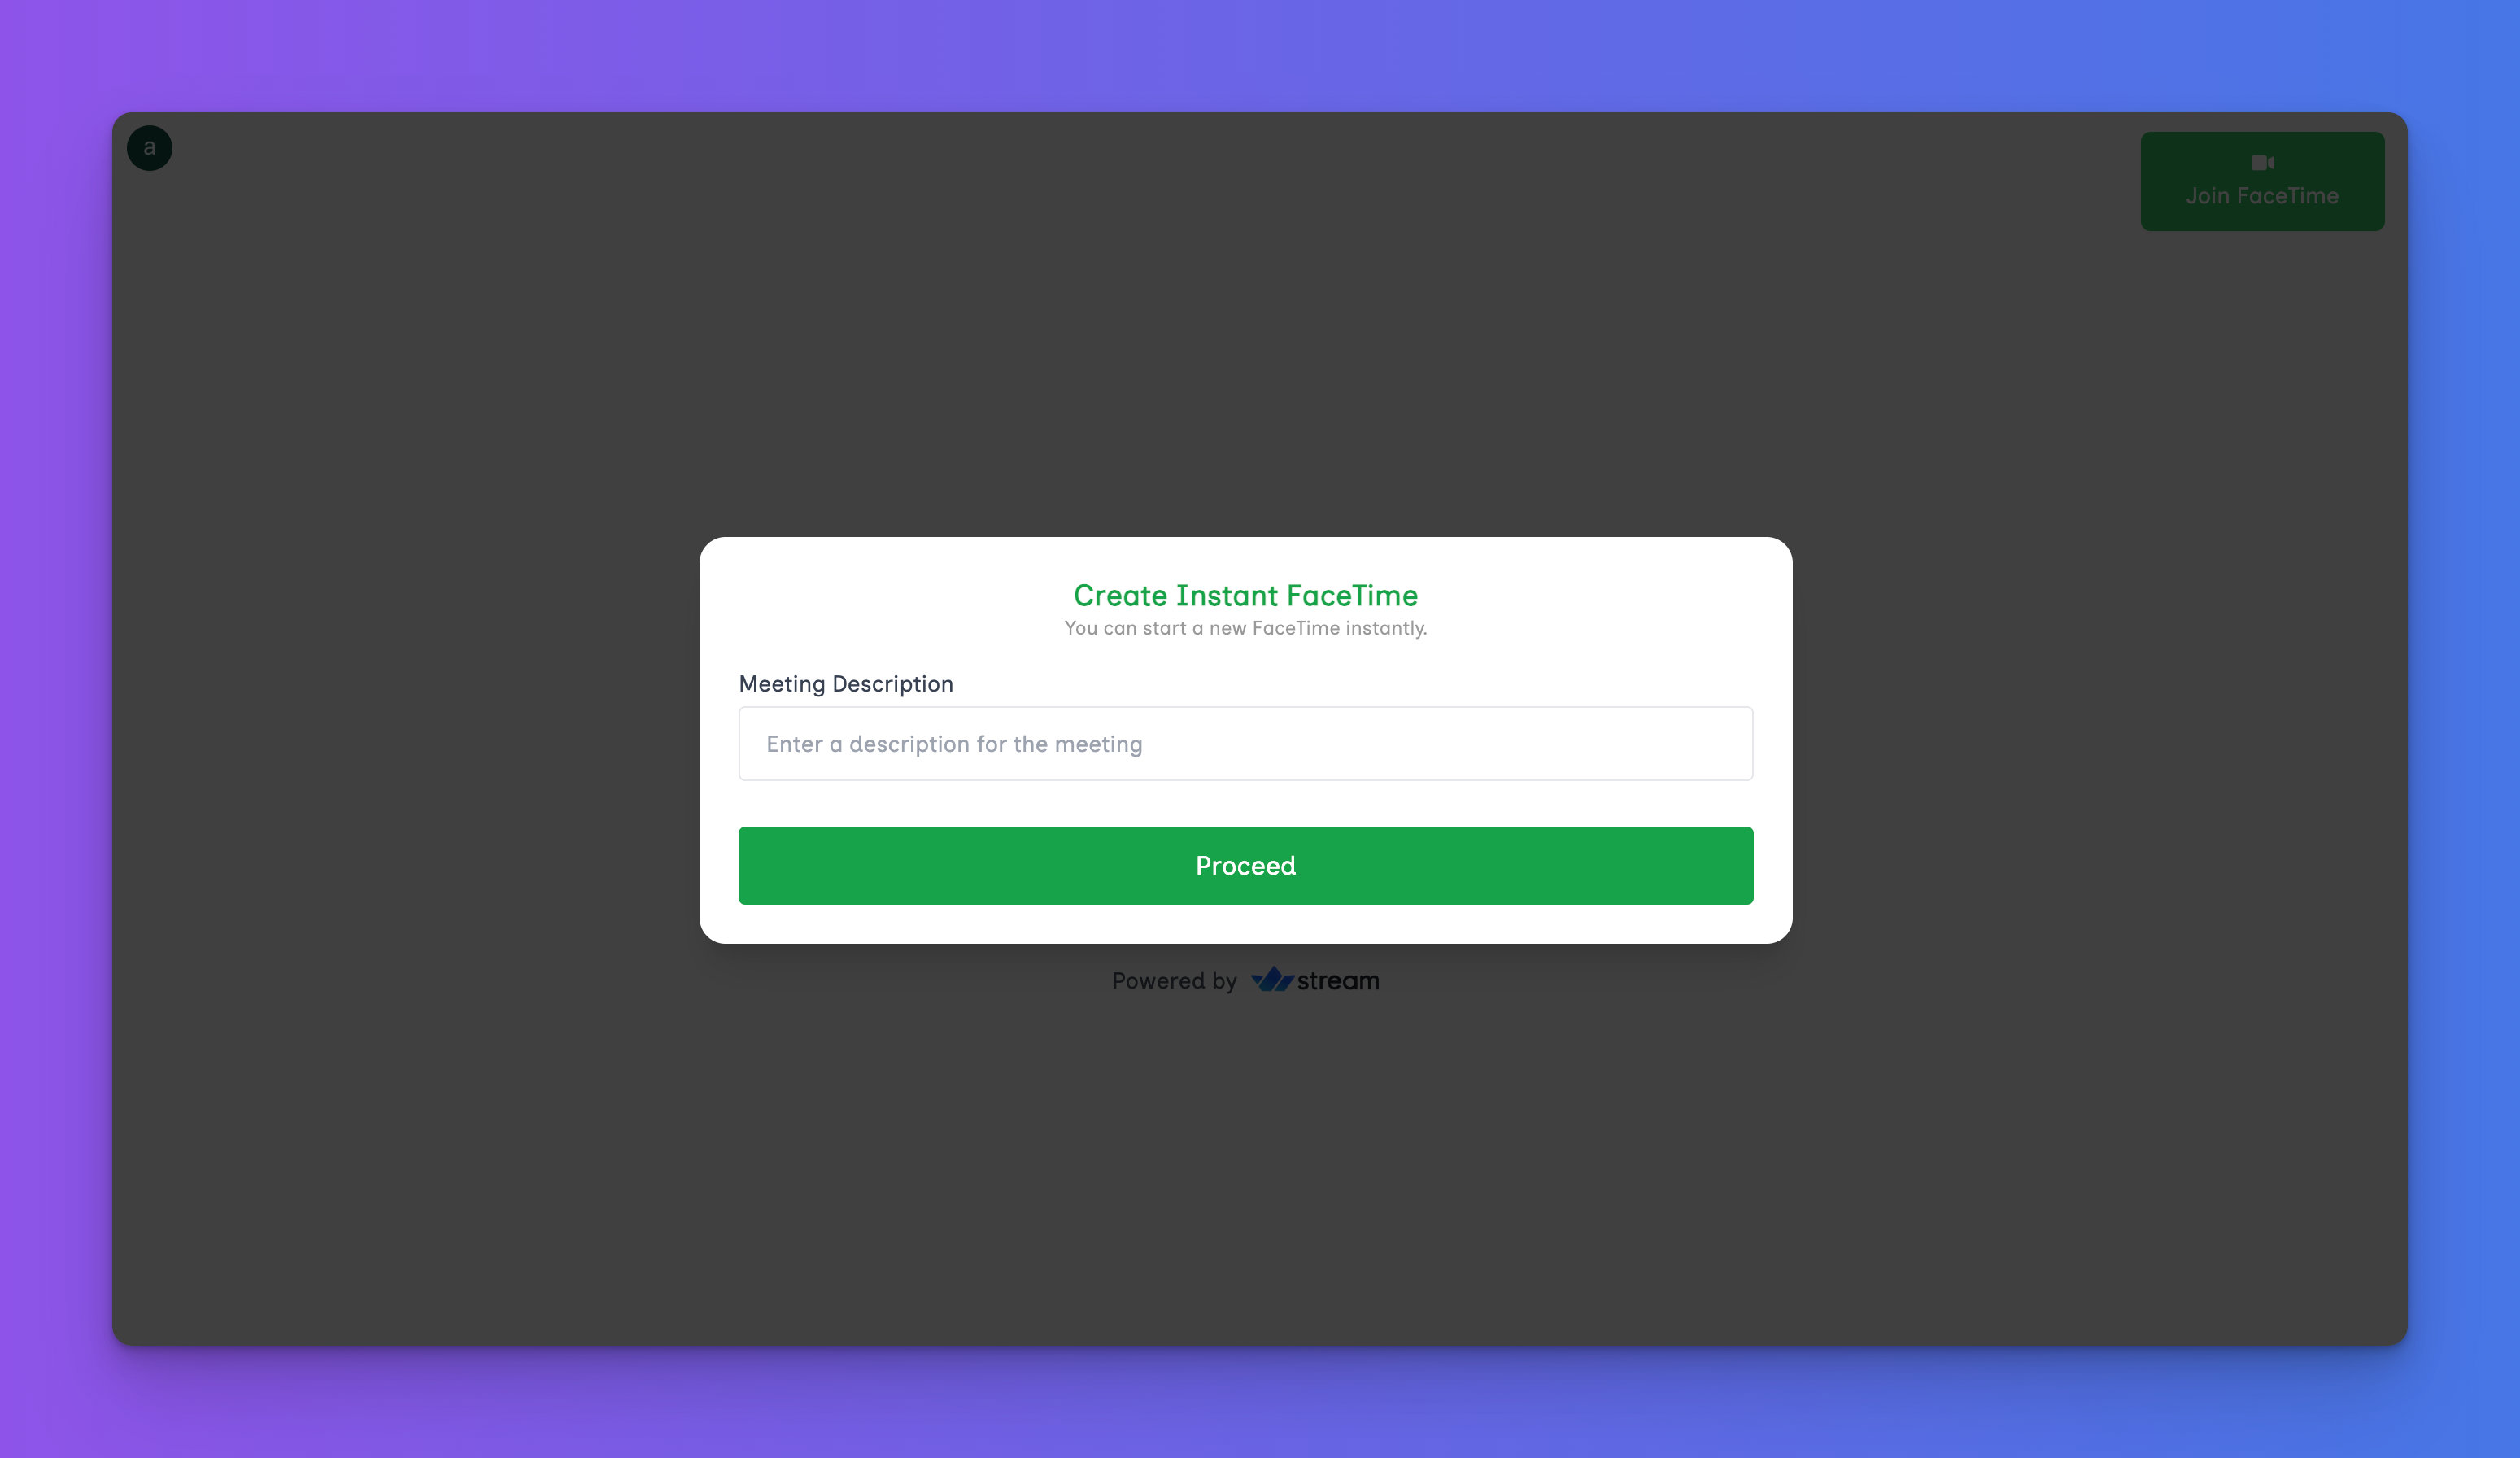
The code snippet above renders a form that allows users to provide a call description. Once the call is created, the link is generated and available to be copied before starting the call.
Finally, add the MeetingForm and MeetingLink components below the CreateLink component:
const MeetingForm = ({
    setShowMeetingLink,
    setFacetimeLink,
}: {
    setShowMeetingLink: Dispatch<SetStateAction<boolean>>;
    setFacetimeLink: Dispatch<SetStateAction<string>>;
}) => {
    const [description, setDescription] = useState<string>("");
    const handleStartMeeting = async (e: React.FormEvent<HTMLFormElement>) => {
        e.preventDefault();
        console.log({ description });
    };
    return (
        <>
            <DialogTitle
                as='h3'
                className='text-lg font-bold leading-6 text-green-600'
            >
                Create Instant FaceTime
            </DialogTitle>
            <Description className='text-xs opacity-40 mb-4'>
                You can start a new FaceTime instantly.
            </Description>
            <form className='w-full' onSubmit={handleStartMeeting}>
                <label
                    className='block text-left text-sm font-medium text-gray-700'
                    htmlFor='description'
                >
                    Meeting Description
                </label>
                <input
                    type='text'
                    name='description'
                    id='description'
                    value={description}
                    required
                    onChange={(e) => setDescription(e.target.value)}
                    className='mt-1 block w-full text-sm py-3 px-4 border-gray-200 border-[1px] rounded mb-3'
                    placeholder='Enter a description for the meeting'
                />
                <button className='w-full bg-green-600 text-white py-3 rounded mt-4'>
                    Proceed
                </button>
            </form>
        </>
    );
};
The MeetingForm component accepts the call description, while the MeetingLink component displays the generated call link and allows users to copy it before starting the call.
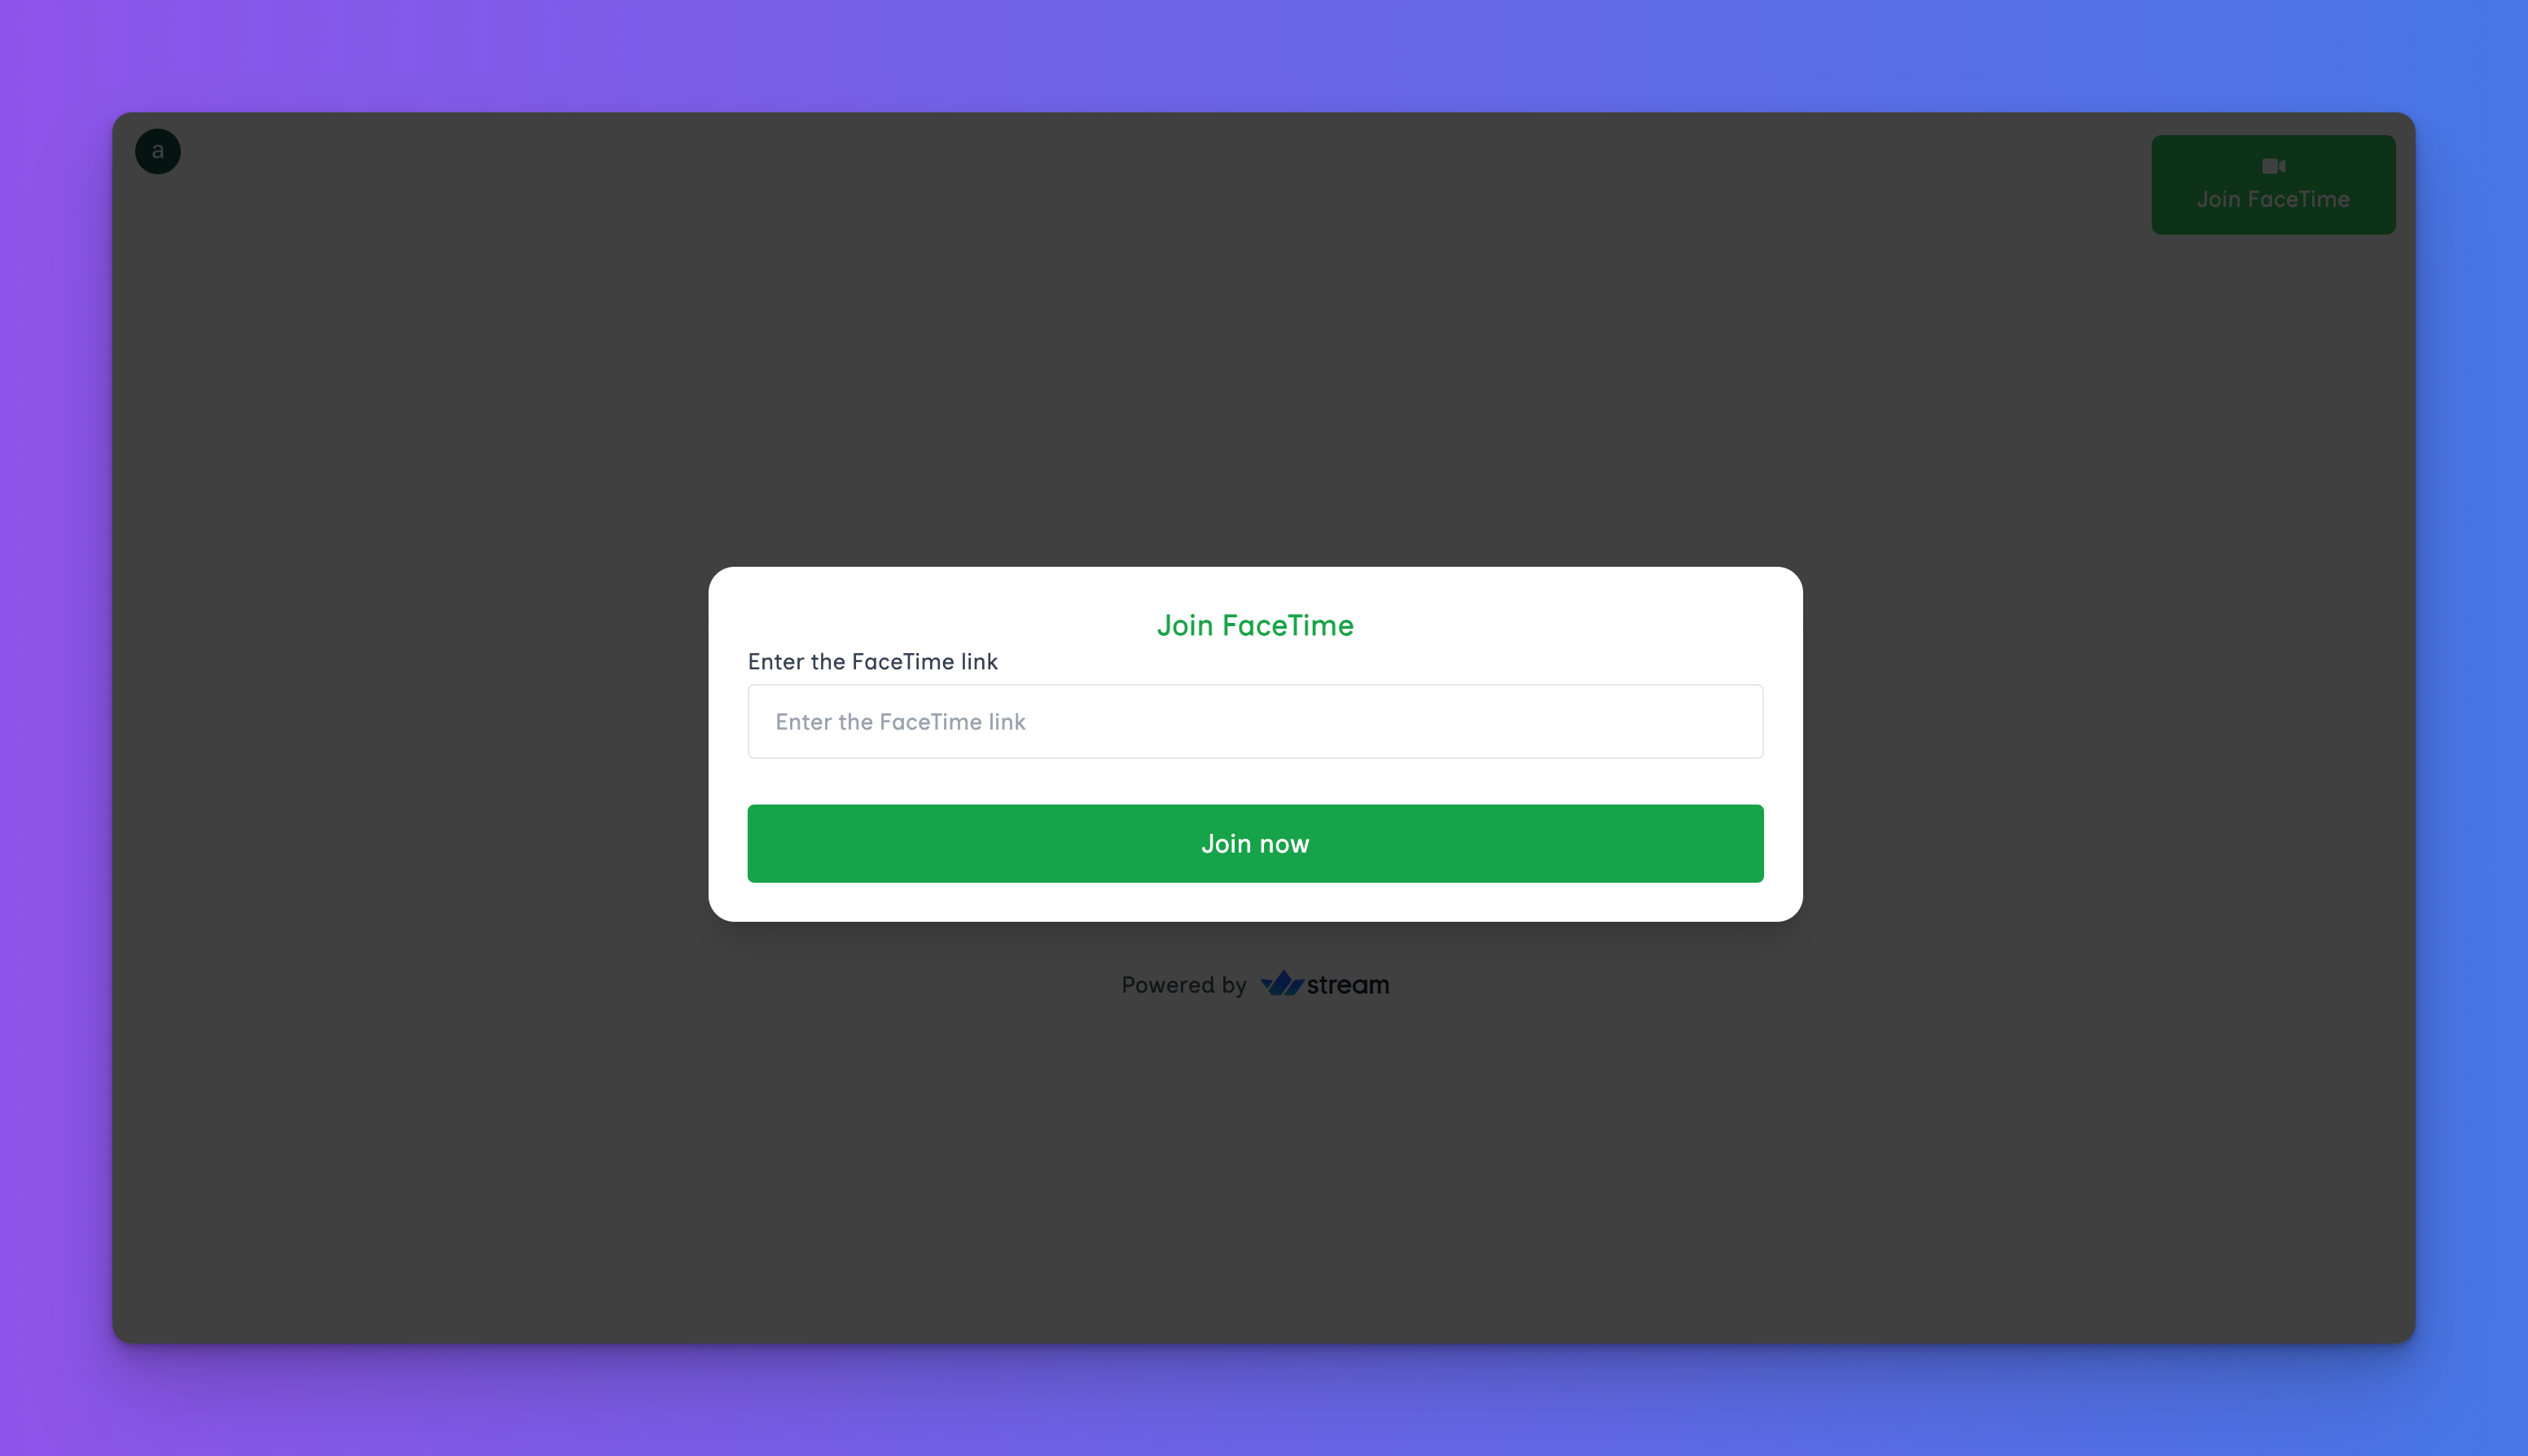
The Join Meeting Modal
Copy the code snippet below into the JoinMeeting.tsx file. It renders a form that accepts the call link and redirects users to the call page.
"use client";
import {
    Dialog,
    DialogTitle,
    DialogPanel,
    Transition,
    TransitionChild,
} from "@headlessui/react";
import { useRouter } from "next/navigation";
import { Fragment, useState } from "react";
export default function JoinMeeting({ enable, setEnable }: Props) {
    const closeModal = () => setEnable(false);
    return (
        <>
            <Transition appear show={enable} as={Fragment}>
                <Dialog as='div' className='relative z-10' onClose={closeModal}>
                    <TransitionChild
                        as={Fragment}
                        enter='ease-out duration-300'
                        enterFrom='opacity-0'
                        enterTo='opacity-100'
                        leave='ease-in duration-200'
                        leaveFrom='opacity-100'
                        leaveTo='opacity-0'
                    >
                        <div className='fixed inset-0 bg-black/75' />
                    </TransitionChild>
                    <div className='fixed inset-0 overflow-y-auto'>
                        <div className='flex min-h-full items-center justify-center p-4 text-center'>
                            <TransitionChild
                                as={Fragment}
                                enter='ease-out duration-300'
                                enterFrom='opacity-0 scale-95'
                                enterTo='opacity-100 scale-100'
                                leave='ease-in duration-200'
                                leaveFrom='opacity-100 scale-100'
                                leaveTo='opacity-0 scale-95'
                            >
                                <DialogPanel className='w-full max-w-2xl transform overflow-hidden rounded-2xl bg-white p-6 align-middle shadow-xl transition-all text-center'>
                                    <CallLinkForm />
                                </DialogPanel>
                            </TransitionChild>
                        </div>
                    </div>
                </Dialog>
            </Transition>
        </>
    );
}
Add the CallLinkForm below the JoinMeeting component:
const CallLinkForm = () => {
    const [link, setLink] = useState<string>("");
    const router = useRouter();
    const handleJoinMeeting = (e: React.FormEvent<HTMLFormElement>) => {
        e.preventDefault();
        router.push(`${link}`);
    };
    return (
        <>
            <DialogTitle
                as='h3'
                className='text-lg font-bold leading-6 text-green-600'
            >
                Join FaceTime
            </DialogTitle>
            <form className='w-full' onSubmit={handleJoinMeeting}>
                <label
                    className='block text-left text-sm font-medium text-gray-700'
                    htmlFor='link'
                >
                    Enter the FaceTime link
                </label>
                <input
                    type='url'
                    name='link'
                    id='link'
                    value={link}
                    onChange={(e) => setLink(e.target.value)}
                    className='mt-1 block w-full text-sm py-3 px-4 border-gray-200 border-[1px] rounded mb-3'
                    placeholder='Enter the FaceTime link'
                />
                <button className='w-full bg-green-600 text-white py-3 rounded mt-4'>
                    Join now
                </button>
            </form>
        </>
    );
};
Congratulations! You’ve completed the app’s interface.
How to Authenticate Users with Clerk
Clerk is a user management platform that enables you to add auth to web apps.
You can install the Clerk Next.js SDK by running the following code snippet in your terminal:
npm install @clerk/nextjs
Create a middleware.ts file within the Next.js src folder and copy the code snippet below into the file:
import { clerkMiddleware, createRouteMatcher } from "@clerk/nextjs/server";
const protectedRoutes = createRouteMatcher([
    "/facetime(.*)",
    "/dashboard",
    "/",
]);
//👇🏻 protects the route
export default clerkMiddleware((auth, req) => {
    if (protectedRoutes(req)) {
        auth().protect();
    }
});
export const config = {
    matcher: ["/((?!.*\\\\..*|_next).*)", "/", "/(api|trpc)(.*)"],
};
The createRouteMatcher function accepts an array containing routes to be protected from unauthenticated users and the clerkMiddleware() function ensures the routes are protected.
Next, import the following Clerk components into the app/layout.tsx file and update the RootLayout function as shown below:
import {
    ClerkProvider,
    SignInButton,
    SignedIn,
    SignedOut,
    UserButton,
} from "@clerk/nextjs";
import "./globals.css";
export default function RootLayout({
    children,
}: {
    children: React.ReactNode;
}) {
    return (
        <ClerkProvider>
            <html lang='en'>
                <body className={inter.className}>
                    <nav className='w-full py-4 md:px-8 px-4 text-center flex items-center justify-between sticky top-0 bg-white '>
                        <div className='flex items-center justify-end gap-5'>
                            {/*-- if user is signed out --*/}
                            <SignedOut>
                                <SignInButton mode='modal' />
                            </SignedOut>
                            {/*-- if user is signed in --*/}
                            <SignedIn>
                                <UserButton />
                            </SignedIn>
                        </div>
                    </nav>
                    {children}
                </body>
            </html>
        </ClerkProvider>
    );
}
After completing this, users will be prompted to create an account or sign in before they can access the application pages.
Finally, create a Clerk account and set up a new Clerk application. Add your Clerk publishable and secret keys to the .env.local file in your project.
NEXT_PUBLIC_CLERK_PUBLISHABLE_KEY=<publishable_key>
CLERK_SECRET_KEY=<secret_key>
How to Set Up Stream in a Next.js app
First, create a Stream account and set up an organization to house your app. Then, copy the following credentials into your .env.local file:
STREAM_APP_ID=<your_app_id>
NEXT_PUBLIC_STREAM_API_KEY=<your_stream_api_key>
STREAM_SECRET_KEY=<your_stream_secret_key>
NEXT_PUBLIC_FACETIME_HOST=http://localhost:3000/facetime
Next, install Stream React Video SDK and the Stream Node.js SDK.
npm install @stream-io/video-react-sdk @stream-io/node-sdk
Create a providers folder containing a StreamVideoProvider.tsx file and copy the following code snippet into the file:
"use client";
import { tokenProvider } from "@/actions/stream.actions";
import { StreamVideo, StreamVideoClient } from "@stream-io/video-react-sdk";
import { useState, ReactNode, useEffect } from "react";
import { useUser } from "@clerk/nextjs";
const apiKey = process.env.NEXT_PUBLIC_STREAM_API_KEY!;
export const StreamVideoProvider = ({ children }: { children: ReactNode }) => {
    const [videoClient, setVideoClient] = useState<StreamVideoClient>();
    const { user, isLoaded } = useUser();
    useEffect(() => {
        if (!isLoaded || !user || !apiKey) return;
        if (!tokenProvider) return;
        const client = new StreamVideoClient({
            apiKey,
            user: {
                id: user?.id,
                name: user?.primaryEmailAddress?.emailAddress,
                image: user?.imageUrl,
            },
            tokenProvider, //👉🏻 pending creation
        });
        setVideoClient(client);
    }, [user, isLoaded]);
    if (!videoClient) return null;
    return <StreamVideo client={videoClient}>{children}</StreamVideo>;
};
Let’s wrap the entire app with the StreamVideoProvider component, which initializes a Stream client to identify each user.
The StreamVideoClient function takes an object containing the API key, the user object with details from Clerk, and a tokenProvider.
Next, let’s create a Next.js server action (tokenProvider) that generates the token.
Create an actions folder, add a stream.actions.ts file, and copy the following code snippet into the file:
//👇🏻 tokenPrvoider function
"use server";
import { currentUser } from "@clerk/nextjs/server";
import { StreamClient } from "@stream-io/node-sdk";
const STREAM_API_KEY = process.env.NEXT_PUBLIC_STREAM_API_KEY!;
const STREAM_API_SECRET = process.env.STREAM_SECRET_KEY!;
export const tokenProvider = async () => {
    const user = await currentUser();
    if (!user) throw new Error("User is not authenticated");
    if (!STREAM_API_KEY) throw new Error("Stream API key secret is missing");
    if (!STREAM_API_SECRET) throw new Error("Stream API secret is missing");
    const streamClient = new StreamClient(STREAM_API_KEY, STREAM_API_SECRET);
    const expirationTime = Math.floor(Date.now() / 1000) + 3600;
    const issuedAt = Math.floor(Date.now() / 1000) - 60;
    //👇🏻 generates a Stream user token
    const token = streamClient.generateUserToken({
        user_id: user.id,
        exp: expirationTime,
        validity_in_seconds: issuedAt,
    });
    //👇🏻 returns the user token
    return token;
};
Finally, update the RootLayout function in the app/layout.tsx file by wrapping the entire application with the StreamVideoProvider component:
import "@stream-io/video-react-sdk/dist/css/styles.css";
import { StreamVideoProvider } from "./providers/StreamVideoProvider";
export default function RootLayout({
    children,
}: {
    children: React.ReactNode;
}) {
    return (
        <ClerkProvider>
            <html lang='en'>
                <body className={inter.className}>
                    <StreamVideoProvider>
                        <nav className='w-full py-4 md:px-8 px-4 text-center flex items-center justify-between sticky top-0 bg-white '>
                            <div className='flex items-center justify-end gap-5'>
                                {/*-- if user is signed out --*/}
                                <SignedOut>
                                    <SignInButton mode='modal' />
                                </SignedOut>
                                {/*-- if user is signed in --*/}
                                <SignedIn>
                                    <UserButton />
                                </SignedIn>
                            </div>
                        </nav>
                        {children}
                    </StreamVideoProvider>
                </body>
            </html>
        </ClerkProvider>
    );
}
Congratulations! You've successfully integrated Stream into the Next.js app.
How to Create and Join Calls with Stream
In this section, you'll learn how to create, schedule, and join calls using the Stream SDK. You'll also learn how to set up the meeting room with the necessary components and fetch upcoming calls from Stream.
Creating and Scheduling calls
To create an instant meeting, execute the handleStartMeeting function. It generates a random ID for the call and creates the meeting using the current date and the provided description.
import { useStreamVideoClient } from "@stream-io/video-react-sdk";
import { useUser } from "@clerk/nextjs";
const client = useStreamVideoClient();
const { user } = useUser();
const handleStartMeeting = async (e: React.FormEvent<HTMLFormElement>) => {
    e.preventDefault();
    if (!client || !user) return;
    try {
        const id = crypto.randomUUID();
        const call = client.call("default", id);
        if (!call) throw new Error("Failed to create meeting");
        await call.getOrCreate({
            data: {
                starts_at: new Date(Date.now()).toISOString(),
                custom: {
                    description,
                },
            },
        });
        setFacetimeLink(`${call.id}`);
        setShowMeetingLink(true);
    } catch (error) {
        console.error(error);
        alert("Failed to create Meeting");
    }
};
The call.getOrCreate() function accepts an optional call description along with the current date and time to initiate the call.
It also allows you to schedule calls for a specific time in the future. In this case, you can specify the desired date and time, and Stream will automatically schedule the call for that period.
import { useStreamVideoClient } from "@stream-io/video-react-sdk";
import { useUser } from "@clerk/nextjs";
const client = useStreamVideoClient();
const { user } = useUser();
const handleScheduleMeeting = async (e: React.FormEvent<HTMLFormElement>) => {
    e.preventDefault();
    if (!client || !user) return;
    try {
        const id = crypto.randomUUID();
        const call = client.call("default", id);
        if (!call) throw new Error("Failed to create meeting");
        await call.getOrCreate({
            data: {
                //👇🏻 only necessary changes
                starts_at: new Date(dateTime).toISOString(),
                custom: {
                    description,
                },
            },
        });
        setFacetimeLink(`${call.id}`);
        setShowMeetingLink(true);
    } catch (error) {
        console.error(error);
        console.error("Failed to create Meeting");
    }
};
Joining calls and the Meeting Page
Recall that the meeting link in the app is declared as:
`${process.env.NEXT_PUBLIC_FACETIME_HOST}/${facetimeLink}`
// 👉🏻 format: <http://localhost:3000/facetime/><call.id>
Therefore, we need to create the /facetime/<callID> route to enable users to join a call. To do this, create a facetime folder with an [id] directory inside, and within that directory, add a page.tsx file. Then, copy the following code snippet into the file:
"use client";
import { useGetCallById } from "@/app/hooks/useGetCallById";
import { useUser } from "@clerk/nextjs";
import {
    StreamCall,
    StreamTheme,
    PaginatedGridLayout,
    CallControls,
} from "@stream-io/video-react-sdk";
import { useParams, useRouter } from "next/navigation";
import { useEffect, useState } from "react";
export default function FaceTimePage() {
    const { id } = useParams<{ id: string }>();
    const [confirmJoin, setConfirmJoin] = useState<boolean>(false);
    const [camMicEnabled, setCamMicEnabled] = useState<boolean>(false);
    const router = useRouter();
    //👇🏻 gets call details by ID
    const { call, isCallLoading } = useGetCallById(id);
    useEffect(() => {
        if (camMicEnabled) {
            call?.camera.enable();
            call?.microphone.enable();
        } else {
            call?.camera.disable();
            call?.microphone.disable();
        }
    }, [call, camMicEnabled]);
    //👇🏻 enable users to join calls
    const handleJoin = () => {
        call?.join();
        setConfirmJoin(true);
    };
    if (isCallLoading) return <p>Loading...</p>;
    if (!call) return <p>Call not found</p>;
    return (
        <main className='min-h-screen w-full items-center justify-center'>
            <StreamCall call={call}>
                <StreamTheme>
                    {confirmJoin ? (
                        <MeetingRoom />
                    ) : (
                        <div className='flex flex-col items-center justify-center gap-5'>
                            <h1 className='text-3xl font-bold'>Join Call</h1>
                            <p className='text-lg'>
                                Are you sure you want to join this call?
                            </p>
                            <div className='flex gap-5'>
                                <button
                                    onClick={handleJoin}
                                    className='px-4 py-3 bg-green-600 text-green-50'
                                >
                                    Join
                                </button>
                                <button
                                    onClick={() => router.push("/")}
                                    className='px-4 py-3 bg-red-600 text-red-50'
                                >
                                    Cancel
                                </button>
                            </div>
                        </div>
                    )}
                </StreamTheme>
            </StreamCall>
        </main>
    );
}
When users visit the meeting page, they are presented with a confirmation message, allowing them to confirm that they want to join the call.
In the code snippet above:
The
useGetCallByIdhook is a custom function that retrieves call details based on the call ID.The
handleJoinfunction allows users to join the call and then displays the<MeetingRoom />component.
Add the MeetingRoom component below the FaceTimePage component:
const MeetingRoom = () => {
    const router = useRouter();
    const handleLeave = () => {
        confirm("Are you sure you want to leave the call?") && router.push("/");
    };
    return (
        <section className='relative min-h-screen w-full overflow-hidden pt-4'>
            <div className='relative flex size-full items-center justify-center'>
                <div className='flex size-full max-w-[1000px] items-center'>
                    <PaginatedGridLayout />
                </div>
                <div className='fixed bottom-0 flex w-full items-center justify-center gap-5'>
                    <CallControls onLeave={handleLeave} />
                </div>
            </div>
        </section>
    );
};
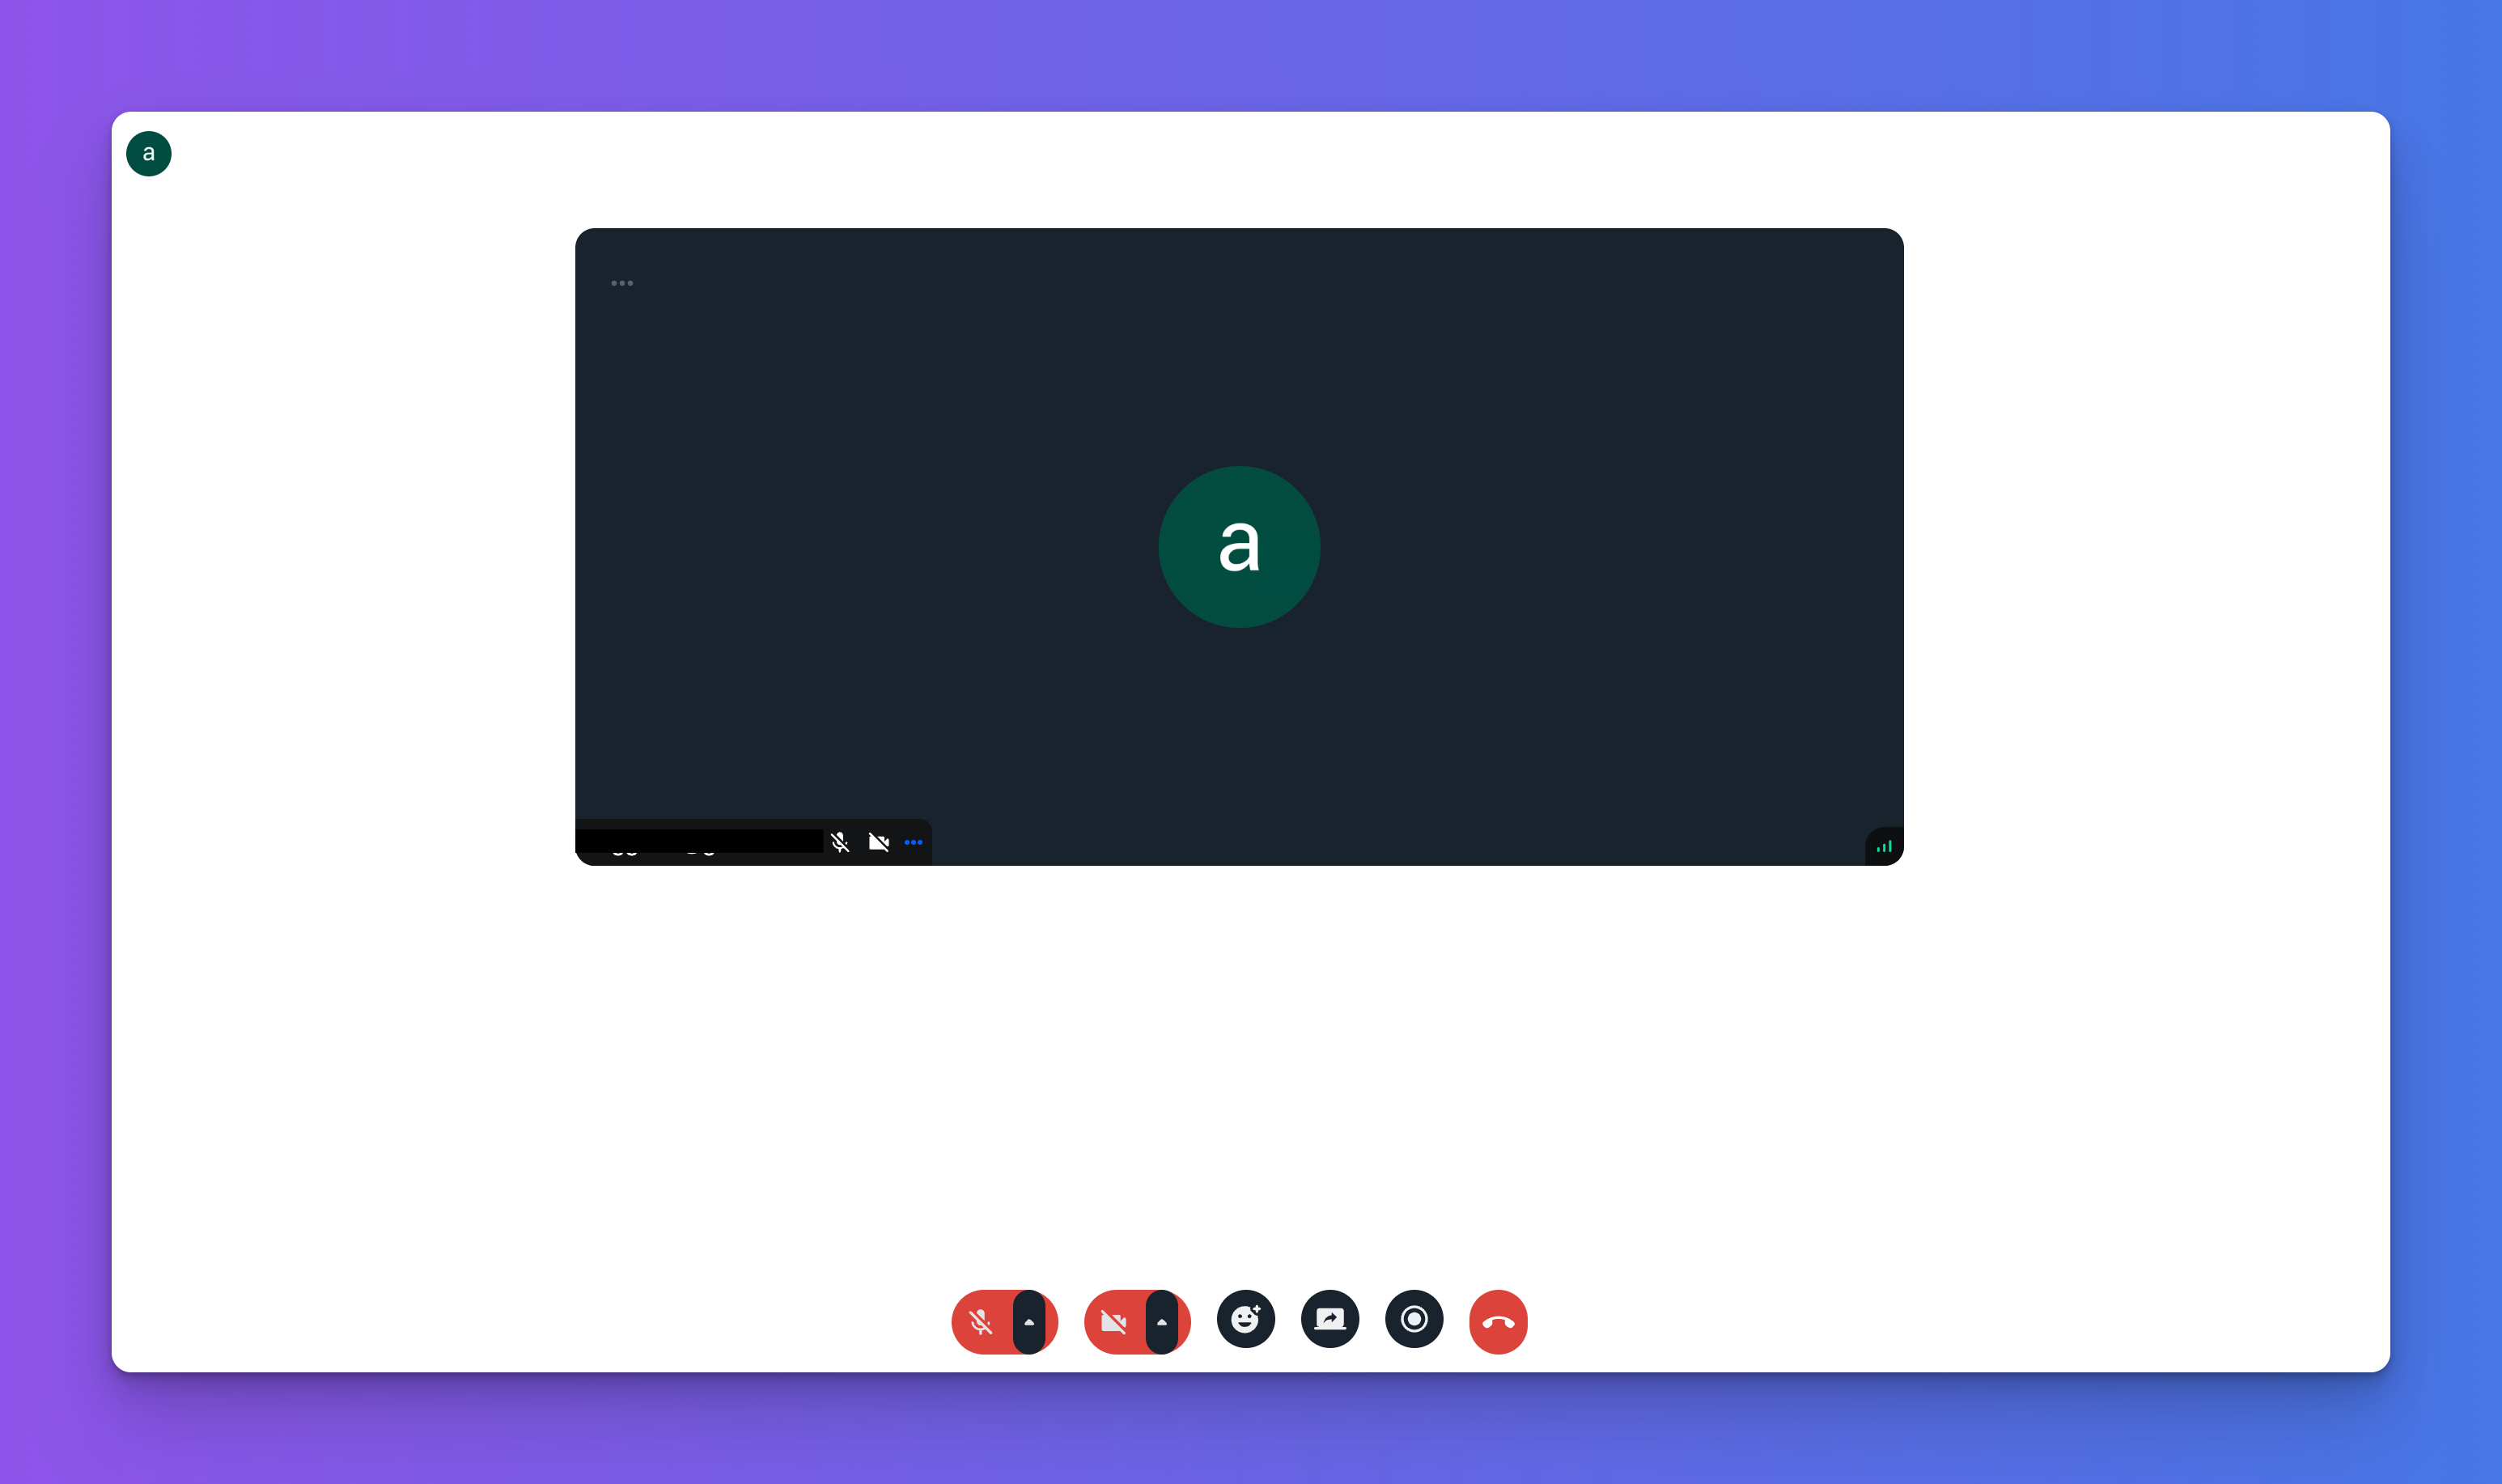
The PaginatedGridLayout arranges participants in a grid layout with pagination, allowing you to manage larger video calls by displaying a set number of participants per page.
The CallControls component provides built-in actions, such as muting, video toggling, and screen sharing, that can be performed during a call. Both components are part of the Stream SDK, making integration seamless.
Additionally, you can switch to the SpeakerLayout, which highlights the dominant speaker or shared screen while displaying other participants in a smaller view.
Finally, create a hooks folder containing the useGetCallById.ts file and copy the code snippet below into the file:
import { useEffect, useState } from "react";
import { Call, useStreamVideoClient } from "@stream-io/video-react-sdk";
export const useGetCallById = (id: string | string[]) => {
    const [call, setCall] = useState<Call>();
    const [isCallLoading, setIsCallLoading] = useState(true);
    const client = useStreamVideoClient();
    useEffect(() => {
        if (!client) return;
        const loadCall = async () => {
            try {
                const { calls } = await client.queryCalls({
                    filter_conditions: { id },
                });
                if (calls.length > 0) setCall(calls[0]);
                setIsCallLoading(false);
            } catch (error) {
                console.error(error);
                setIsCallLoading(false);
            }
        };
        loadCall();
    }, [client, id]);
    return { call, isCallLoading };
};
The code snippet above filters the call list and returns the call with a matching ID, allowing users to join the specified call.
Retrieving Upcoming Calls
To retrieve upcoming calls from Stream, you can create a custom hook that fetches all the calls created by the user, as well as the calls they are a member of.
import { useEffect, useState } from "react";
import { useUser } from "@clerk/nextjs";
import { Call, useStreamVideoClient } from "@stream-io/video-react-sdk";
export const useGetCalls = () => {
    const { user } = useUser();
    const client = useStreamVideoClient();
    const [calls, setCalls] = useState<Call[]>();
    const [isLoading, setIsLoading] = useState(false);
    useEffect(() => {
        const loadCalls = async () => {
            if (!client || !user?.id) return;
            setIsLoading(true);
            try {
                //👇🏻 gets all the calls the user is featured in
                const { calls } = await client.queryCalls({
                    sort: [{ field: "starts_at", direction: -1 }],
                    filter_conditions: {
                        starts_at: { $exists: true },
                        $or: [
                            { created_by_user_id: user.id },
                            { members: { $in: [user.id] } },
                        ],
                    },
                });
                setCalls(calls);
            } catch (error) {
                console.error(error);
            } finally {
                setIsLoading(false);
            }
        };
        loadCalls();
    }, [client, user?.id]);
    const now = new Date();
    //👇🏻 gets only calls that are yet to start
    const upcomingCalls = calls?.filter(({ state: { startsAt } }: Call) => {
        return startsAt && new Date(startsAt) > now;
    });
    return { upcomingCalls, isLoading };
};
The useGetCalls hook retrieves the list of upcoming calls, which can then be displayed in the UpcomingMeeting modal.
Congratulations! You’ve completed the project for this tutorial.
Check out the live app here.
Next Steps
So far, you’ve learned how to build a video conferencing app. If you'd like to learn more about how you can leverage Stream to build scalable apps, then check out these resources:
Before We End...
I hope you found it insightful and that it has given you enough motivation on how to build apps using awesome developer tools.
These are some of my other most recent blog posts.
Check out my blog for more tutorials like this on awesome developer tools.
Follow me on Twitter to stay updated on my side projects and ongoing learning.
Happy coding.