Databases play a vital role in the development of applications across mobile and web platforms. Adequate knowledge of data interactions between the application structure and the database is essential for storing relevant application data.
Object-relational mapping, as a programming concept, is an efficient standard protocol for facilitating seamless connection with databases. But what does it really mean, and how do you set it up as a developer? We’ll answer these questions and highlight more about object-relational mapping.
Here are the prerequisites:
Knowledge of Node.js
Use the Express framework
An installed MySQL database
Table of Contents
Table of Contents
What is an ORM?
How to Set Up Your Node.js Server
How to Integrate Relevant Packages
Demo Project
Additional Information
What is an ORM?
Object Relational Mapping (ORM) is a database communication concept in programming that involves the abstraction of data types as compatible object-oriented programming variables. It simply eliminates the use of database-defined queries and storage types to allow ease of creating databases via the programming languages.
Its use has been widely adopted in the tech space as has more advantages than conventional database query methods. Here are some of them:
It reduces the risk of data manipulation: SQL and non-SQL injections involve inputting malicious SQL syntaxes and queries into the database, which can compromise database security. Having an ORM in place adds an input validation scheme feature, and details the expected input variable syntax and processes it accordingly.
Ease of database communication: ORM serves to simplify the use of databases as a data tool without undergoing the process of learning a different database query language. The ORM schema can be highlighted in an object-oriented fashion in the application language and can be configured to automatically translate the code to queries compatible with the database.
This feature also allows easy code portability, achieving maintenance of a single database integration code base while changing the database without any adverse outcome. It is highly flexible and can be used in any database of choice.
It also has additional features included to allow database interactions. Database migration features and version control processes are provided. With these, we have seen some of its benefits, we will then highlight popular ORM tools used globally.
Here are the popular ORM tools:
For this article, we’ll be streamlining our ORM use cases to a basic Node.js project linked to a MySQL database. We’ll use the Sequelize ORM as the tool of choice.
With an average package download of 8.5 million monthly and an active development community, Sequelize boasts robust features that seamlessly integrate databases with backend applications. It also provides a user oriented documentation which helps guide the user on setting up and using the tool.
Here is a link to the documentation. It also offers support for MySQL, DB2, and SQLite Microsoft SQL server, and it offers features such as read replication, lazy loading, and efficient database transaction properties.
Next, we’ll set up our web application and install Sequelize to connect us to a MySQL database hosted locally.
How to Set Up Your Node.js Server
In this section you’ll set up our Node server. Navigate to the command line and execute npm init. This command creates a new Node project structure for you.
Next, install the Express package – this will serve as the backend framework. You can do this by running the npm i express command.
How to Integrate Relevant Packages
For the purpose of this tutorial, we’ll install the Sequelize Node package manager in our Node application in order to set up the ORM communication to the database.
To set this up, execute npm i sequelize.
We’ll use a locally hosted MySQL database. To do this, we’ll install an npm package database driver. In this case, we will be installing mysql2. Here is a link to the package
Run npm i mysql2 to install it.
Let’s move on to configuring the connection to the database and building our demo project.
Demo Project
In this section we’ll build a simple backend server that performs Create-Read-Update-Delete operations, with the Sequelize library serving as the connection pipeline.
In order to begin the project, we’ll have to set up the database connection for our application. We’ll create a database connection file and set up our database credentials. You can name the file SequelizeConfig.
module.exports = {
    HOST: "localhost",
    USER: "root",
    PASSWORD: "",
    DB: "sequel",
    dialect: "mysql"
}
In the code above, the database credentials were specified, along with the host address. In our case, the database is locally hosted, so localhost is the default host.
The database login details were also provided. The user here is the root, while the password was set to an empty string. This should be tweaked to ensure database security. I also created a defunct database named “sequel”.
The dialect refers to the type of database the user intends to use. In our case, the dialect is MySQL. Note that this can also be replicated on a cloud hosted database with the credentials obtained. With that, let's integrate the connection file with the application.
const SequelConfig = require('../config/sequelize');
const Sequelize = require('sequelize');
const sequelize = new Sequelize(SequelCOnfig.DB, SequelCOnfig.USER, SequelCOnfig.PASSWORD, {
    host: SequelCOnfig.HOST,
    dialect: SequelCOnfig.dialect
});
In order to facilitate a connection to the database, the variables in the config file were imported and initialized in the Sequelize setup file.
const db = {};
db.Sequelize = Sequelize;
db.sequelize = sequelize;
db.user = require('../model/user.model')(sequelize, Sequelize);
db.token = require('../model/token.model')(sequelize, Sequelize)
module.exports= db;
This file above imports the config file created previously and initializes the Sequelize library. The code then fetches the database details inputted in the config file and, when executed, creates the database.
Furthermore, the various database models which will be discussed subsequently are then integrated with the defunct database and generates a SQL database table .
To get this up and running, the database file created is invoked using the sequelize.sync() method. Any error encountered is logged and the database connection gets terminated.
db.sequelize.sync().then(() => {
  console.log('user created ');
}).catch(err => {
  console.error(err)
})
We’ll go on to discuss the database models.
Models
const Sequelize = require("sequelize");
module.exports = (sequelize) => {
sequelize.define(
"user", {
firstName: {
type : Sequelize.DataTypes.STRING,
allowNull : false
},
lastName: {
type : Sequelize.DataTypes.STRING,
allowNull : false
},
email : {
type : Sequelize.DataTypes.STRING,
allowNull : false, unique: true
},
password: {
type : Sequelize.DataTypes.STRING,
allowNull : false
},
role:  {
type : Sequelize.DataTypes.STRING,
allowNull : false
}
}
)
}
In the code above, the user model was initialized in Sequelize ORM and the field details were specified: email, role, lastName, and password. The type of data to be received was also specified.
It also provides an option to ensure the uniqueness of the user details, and the option to prevent the user from leaving some fields empty via the use of allowNull = false.
On execution of the application, the Sequelize ORM creates an SQL equivalent of the model as a data table.
Next, we’ll work on the CRUD functions in Node.js.
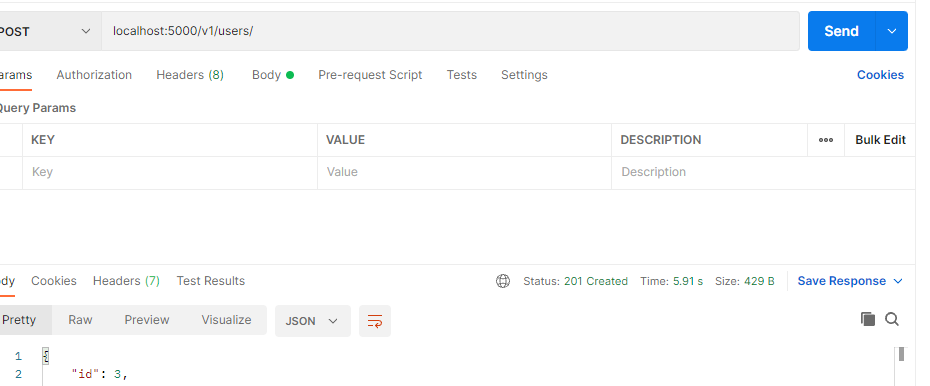
Create Operation
const createUser = async (userInfo) => {
try {
// Check if the email already exists in the database
const ifEmailExists = await User.findOne({ where: { email: userInfo.email } });
if (ifEmailExists) {
throw new ApiError('Email has already been registered');
}
// Create the new user
const newUser = await User.create(userInfo);
return newUser; // Return the created user object
} catch (error) {
// Handle errors such as validation or uniqueness constraint
throw error;
}
};
The function above highlights the controller function for creating user entries in the Express server.
The function is asynchronous, which allows for execution of some commands before eventual execution. The code ensures that the user email doesn’t exist in the database before cresting a new user.
In addition, we also ensured that each email field is unique. If the user details are entered into the database successfully, a “successful” response is sent back to the server. Additionally, any error encountered leads to termination of the function and the error gets sent back to the server.
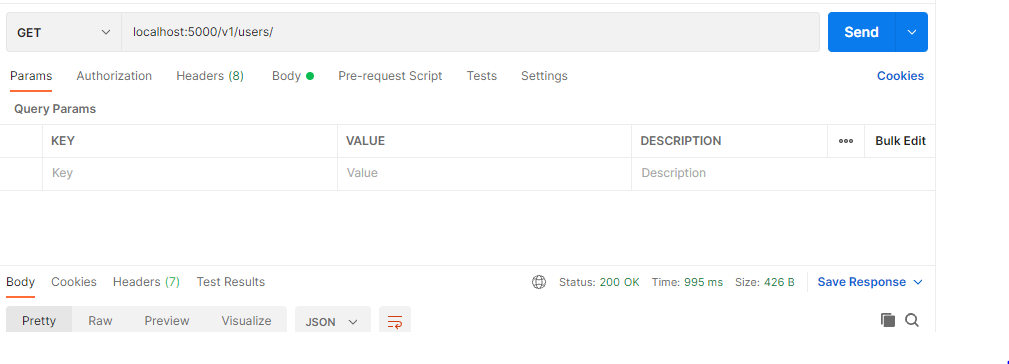
Read Operation
const FetchUser = async (userId) => {
let userDets;
if (userId) {
// Fetch a single user by ID if userId is provided
userDets = await User.findOne({ where: { id: userId } });
// Check if the user exists
if (!userDets) {
throw new ApiError(httpStatus.NOT_FOUND, 'User not found');
}
} else {
// Fetch all users if no userId is provided
userDets = await User.findAll();
// Check if any users were found
if (userDets.length === 0) {
throw new ApiError(httpStatus.NOT_FOUND, 'No users found');
}
}
The read operation fetches the desired query and sends it back to the user without modification. The user ID, which should be unique, is used to search for a specific user. In this scenario, we want access to all the users created in the database.
In case the requested query is not found, an appropriate error code is generated.
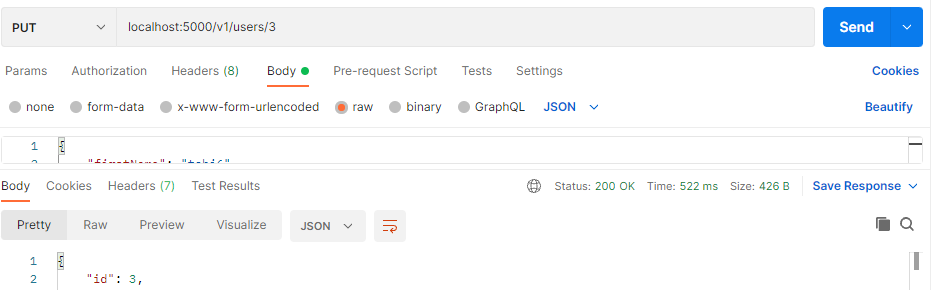
Update Operation
const updateUser = async (userId, userDetails) => {
// First, find the user by their ID
const user = await User.findOne({ where: { id: userId } });
if (!user) {
throw new ApiError(httpStatus.BAD_REQUEST, "User doesn't exist");
}
// Update the user with the new details
await User.update(userDetails, { where: { id: userId } });
// Fetch the updated user to return it
const updatedUser = await User.findOne({ where: { id: userId } });
console.log('Updated user:', updatedUser); // Log the updated user
return updatedUser; // Return the updated user object
};
The update operation aims to modify the data entered in previous operations. That is, to update some data fields.
In the case of Sequelize, the update method is invoked. To succeed with this, the particular user to be edited must be identified. The code above then generates the updated data field and sends it as the output of a successful request.
Delete Operation
const deleteUser = async (userId) => {
const user = await User.findOne({ where: { id: userId } });
if (!user) {
throw new ApiError(httpStatus.BAD_REQUEST, "User doesn't exist");
}
// Delete the user
await user.destroy();
console.log('Deleted user:', user); // Log the deleted user
return user; // Return the deleted user object (useful for confirmation)
};
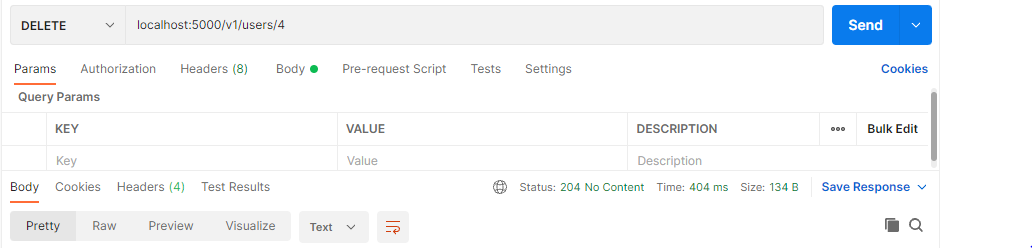
The delete operation is invoked when data in the database table needs to be deleted. Sequelize makes provision for this via the use of the destroy method. This method deletes a specific user. When executed, a success response code is displayed.
Additional Information
So far, we have integrated an ORM library to serve as a connection between our backend application and our relational database. We also explored advanced concepts such as database migrations and CRUD operations. To learn more about this, you can explore the documentation and utilize it in building more complex projects, as hands-on learning is much encouraged.
Feel free to reach out to me on my blog and check out my other articles here. Till next time, keep on coding!