
SQLite is one of the most popular relational database management systems (RDBMS). It’s lightweight, meaning that it doesn’t take up much space on your system. One of its best features is that it’s serverless, so you don’t need to install or manage a separate server to use it.
Instead, it stores everything in a simple file on your computer. It also requires zero configuration, so there’s no complicated setup process, making it perfect for beginners and small projects.
SQLite is a great choice for small to medium applications because it’s easy to use, fast, and can handle most tasks that bigger databases can do, but without the hassle of managing extra software. Whether you're building a personal project or prototyping a new app, SQLite is a solid option to get things up and running quickly.
In this tutorial, you'll learn how to work with SQLite using Python. Here’s what we’re going to cover in this tutorial:
How to Set Up Your Python Environment
How to Create an SQLite Database
How to Create Database Tables
How to Insert Data into a Table
How to Query Data
How to Update and Delete Data
How to Use Transactions
How to Optimize SQLite Query Performance with Indexing
How to Handle Errors and Exceptions
How to Export and Import Data [Bonus Section]
Wrapping Up
This tutorial is perfect for anyone who wants to get started with databases without diving into complex setups.
How to Set Up Your Python Environment
Before working with SQLite, let’s ensure your Python environment is ready. Here’s how to set everything up.
Installing Python
If you don’t have Python installed on your system yet, you can download it from the official Python website. Follow the installation instructions for your operating system (Windows, macOS, or Linux).
To check if Python is installed, open your terminal (or command prompt) and type:
python --version
This should show the current version of Python installed. If it’s not installed, follow the instructions on the Python website.
Installing SQLite3 Module
The good news is that SQLite3 comes built-in with Python! You don’t need to install it separately because it’s included in the standard Python library. This means you can start using it right away without any additional setup.
How to Create a Virtual Environment (Optional but Recommended)
It’s a good idea to create a virtual environment for each project to keep your dependencies organized. A virtual environment is like a clean slate where you can install packages without affecting your global Python installation.
To create a virtual environment, follow these steps:
First, open your terminal or command prompt and navigate to the directory where you want to create your project.
Run the following command to create a virtual environment:
python -m venv env
Here, env is the name of the virtual environment. You can name it anything you like.
- Activate the virtual environment:
# Use the command for Windows
env\Scripts\activate
# Use the command for macOS/Linux:
env/bin/activate
After activating the virtual environment, you’ll notice that your terminal prompt changes, showing the name of the virtual environment. This means you’re now working inside it.
Installing Necessary Libraries
We’ll need a few additional libraries for this project. Specifically, we’ll use:
pandas: This is an optional library for handling and displaying data in tabular format, useful for advanced use cases.faker: This library will help us generate fake data, like random names and addresses, which we can insert into our database for testing.
To install pandas and faker, simply run the following commands:
pip install pandas faker
This installs both pandas and faker into your virtual environment. With this, your environment is set up, and you’re ready to start creating and managing your SQLite database in Python!
How to Create an SQLite Database
A database is a structured way to store and manage data so that it can be easily accessed, updated, and organized. It’s like a digital filing system that allows you to efficiently store large amounts of data, whether it’s for a simple app or a more complex system. Databases use tables to organize data, with rows and columns representing individual records and their attributes.
How SQLite Databases Work
Unlike most other database systems, SQLite is a serverless database. This means that it doesn’t require setting up or managing a server, making it lightweight and easy to use. All the data is stored in a single file on your computer, which you can easily move, share, or back up. Despite its simplicity, SQLite is powerful enough to handle many common database tasks and is widely used in mobile apps, embedded systems, and small to medium-sized projects.
How to Create a New SQLite Database
Let’s create a new SQLite database and learn how to interact with it using Python’s sqlite3 library.
Connecting to the Database
Since sqlite3 is pre-installed, you just need to import it in your Python script. To create a new database or connect to an existing one, we use the sqlite3.connect() method. This method takes the name of the database file as an argument. If the file doesn’t exist, SQLite will automatically create it.
import sqlite3
# Connect to the SQLite database (or create it if it doesn't exist)
connection = sqlite3.connect('my_database.db')
In this example, a file named my_database.db is created in the same directory as your script. If the file already exists, SQLite will just open the connection to it.
Creating a Cursor
Once you have a connection, the next step is to create a cursor object. The cursor is responsible for executing SQL commands and queries on the database.
# Create a cursor object
cursor = connection.cursor()
Closing the Connection
After you’ve finished working with the database, it’s important to close the connection to free up any resources. You can close the connection with the following command:
# Close the database connection
connection.close()
However, you should only close the connection once you’re done with all your operations.
When you run your Python script, a file named my_database.db will be created in your current working directory. You’ve now successfully created your first SQLite database!
How to Use Context Manager to Open and Close Connections
Python provides a more efficient and cleaner way to handle database connections using the with statement, also known as a context manager. The with statement automatically opens and closes the connection, ensuring that the connection is properly closed even if an error occurs during the database operations. This eliminates the need to manually call connection.close().
Here’s how you can use the with statement to handle database connections:
import sqlite3
# Step 1: Use 'with' to connect to the database (or create one) and automatically close it when done
with sqlite3.connect('my_database.db') as connection:
    # Step 2: Create a cursor object to interact with the database
    cursor = connection.cursor()
    print("Database created and connected successfully!")
# No need to call connection.close(); it's done automatically!
From now on, we’ll use the with statement in our upcoming code examples to manage database connections efficiently. This will make the code more concise and easier to maintain.
How to Create Database Tables
Now that we’ve created an SQLite database and connected to it, the next step is to create tables inside the database. A table is where we’ll store our data, organized in rows (records) and columns (attributes). For this example, we’ll create a table called Students to store information about students, which we’ll reuse in upcoming sections.
To create a table, we use SQL's CREATE TABLE statement. This command defines the table structure, including the column names and the data types for each column.
Here’s a simple SQL command to create a Students table with the following fields:
id: A unique identifier for each student (an integer).name: The student's name (text).
age: The student's age (an integer).
email: The student's email address (text).
The SQL command to create this table would look like this:
CREATE TABLE Students (
    id INTEGER PRIMARY KEY AUTOINCREMENT,
    name TEXT NOT NULL,
    age INTEGER,
    email TEXT
);
We can execute this CREATE TABLE SQL command in Python using the sqlite3 library. Let’s see how to do that.
import sqlite3
# Use 'with' to connect to the SQLite database and automatically close the connection when done
with sqlite3.connect('my_database.db') as connection:
    # Create a cursor object
    cursor = connection.cursor()
    # Write the SQL command to create the Students table
    create_table_query = '''
    CREATE TABLE IF NOT EXISTS Students (
        id INTEGER PRIMARY KEY AUTOINCREMENT,
        name TEXT NOT NULL,
        age INTEGER,
        email TEXT
    );
    '''
    # Execute the SQL command
    cursor.execute(create_table_query)
    # Commit the changes
    connection.commit()
    # Print a confirmation message
    print("Table 'Students' created successfully!")
IF NOT EXISTS: This ensures that the table is only created if it doesn’t already exist, preventing errors if the table has been created before.connection.commit(): This saves (commits) the changes to the database.
When you run the Python code above, it will create the Students table in the my_database.db database file. You’ll also see a message in the terminal confirming that the table has been created successfully.
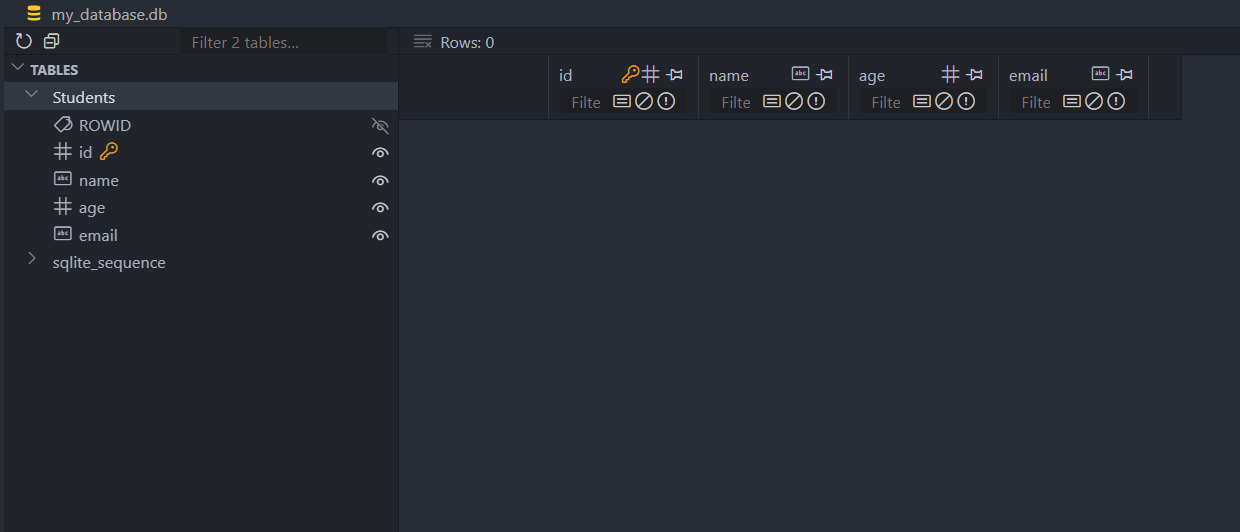
If you’re using Visual Studio Code, you can install the SQLite Viewer extension to view SQLite databases.
Data Types in SQLite and Their Mapping to Python
SQLite supports several data types, which we need to understand when defining our tables. Here’s a quick overview of common SQLite data types and how they map to Python types:
| SQLite Data Type | Description | Python Equivalent |
| INTEGER | Whole numbers | int |
| TEXT | Text strings | str |
| REAL | Floating-point numbers | float |
| BLOB | Binary data (e.g., images, files) | bytes |
| NULL | Represents no value or missing data | None |
In our Students table:
idis of typeINTEGER, which maps to Python’sint.nameandemailare of typeTEXT, which map to Python’sstr.ageis also of typeINTEGER, mapping to Python’sint.
How to Insert Data into a Table
Now that we have our Students table created, it’s time to start inserting data into the database. In this section, we’ll cover how to insert both single and multiple records using Python and SQLite, and how to avoid common security issues like SQL injection by using parameterized queries.
How to Insert a Single Record
To insert data into the database, we use the INSERT INTO SQL command. Let’s start by inserting a single record into our Students table.
Here’s the basic SQL syntax for inserting a single record:
INSERT INTO Students (name, age, email)
VALUES ('John Doe', 20, 'johndoe@example.com');
However, instead of writing SQL directly in our Python script with hardcoded values, we’ll use parameterized queries to make our code more secure and flexible. Parameterized queries help prevent SQL injection, a common attack where malicious users can manipulate the SQL query by passing harmful input.
Here’s how we can insert a single record into the Students table using a parameterized query:
import sqlite3
# Use 'with' to open and close the connection automatically
with sqlite3.connect('my_database.db') as connection:
    cursor = connection.cursor()
    # Insert a record into the Students table
    insert_query = '''
    INSERT INTO Students (name, age, email)
    VALUES (?, ?, ?);
    '''
    student_data = ('Jane Doe', 23, 'jane@example.com')
    cursor.execute(insert_query, student_data)
    # Commit the changes automatically
    connection.commit()
    # No need to call connection.close(); it's done automatically!
    print("Record inserted successfully!")
The ? placeholders represent the values to be inserted into the table. The actual values are passed as a tuple (student_data) in the cursor.execute() method.
How to Insert Multiple Records
If you want to insert multiple records at once, you can use the executemany() method in Python. This method takes a list of tuples, where each tuple represents one record.
To make our example more dynamic, we can use the Faker library to generate random student data. This is useful for testing and simulating real-world scenarios.
from faker import Faker
import sqlite3
# Initialize Faker
fake = Faker(['en_IN'])
# Use 'with' to open and close the connection automatically
with sqlite3.connect('my_database.db') as connection:
    cursor = connection.cursor()
    # Insert a record into the Students table
    insert_query = '''
    INSERT INTO Students (name, age, email)
    VALUES (?, ?, ?);
    '''
    students_data = [(fake.name(), fake.random_int(
        min=18, max=25), fake.email()) for _ in range(5)]
    # Execute the query for multiple records
    cursor.executemany(insert_query, students_data)
    # Commit the changes
    connection.commit()
    # Print confirmation message
    print("Fake student records inserted successfully!")
In this code:
Faker()generates random names, ages, and emails for students. Passing the locale([‘en_IN’]) is optional.cursor.executemany(): This method allows us to insert multiple records at once, making the code more efficient.students_data: A list of tuples where each tuple represents one student’s data.
How to Handle Common Issues: SQL Injection
SQL injection is a security vulnerability where attackers can insert or manipulate SQL queries by providing harmful input. For example, an attacker might try to inject code like '; DROP TABLE Students; -- to delete the table.
By using parameterized queries (as demonstrated above), we avoid this issue. The ? placeholders in parameterized queries ensure that input values are treated as data, not as part of the SQL command. This makes it impossible for malicious code to be executed.
How to Query Data
Now that we’ve inserted some data into our Students table, let’s learn how to retrieve the data from the table. We'll explore different methods for fetching data in Python, including fetchone(), fetchall(), and fetchmany().
To query data from a table, we use the SELECT statement. Here’s a simple SQL command to select all columns from the Students table:
SELECT * FROM Students;
This command retrieves all records and columns from the Students table. We can execute this SELECT query in Python and fetch the results.
How to Fetch All Records
Here’s how we can fetch all records from the Students table:
import sqlite3
# Use 'with' to connect to the SQLite database
with sqlite3.connect('my_database.db') as connection:
    # Create a cursor object
    cursor = connection.cursor()
    # Write the SQL command to select all records from the Students table
    select_query = "SELECT * FROM Students;"
    # Execute the SQL command
    cursor.execute(select_query)
    # Fetch all records
    all_students = cursor.fetchall()
    # Display results in the terminal
    print("All Students:")
    for student in all_students:
        print(student)
In this example, the fetchall() method retrieves all rows returned by the query as a list of tuples.
All Students:
(1, 'Jane Doe', 23, 'jane@example.com')
(2, 'Bahadurjit Sabharwal', 18, 'tristanupadhyay@example.net')
(3, 'Zayyan Arya', 20, 'yashawinibhakta@example.org')
(4, 'Hemani Shukla', 18, 'gaurikanarula@example.com')
(5, 'Warda Kara', 20, 'npatil@example.net')
(6, 'Mitali Nazareth', 19, 'sparekh@example.org')
How to Fetch a Single Record
If you want to retrieve only one record, you can use the fetchone() method:
import sqlite3
# Use 'with' to connect to the SQLite database
with sqlite3.connect('my_database.db') as connection:
    # Create a cursor object
    cursor = connection.cursor()
    # Write the SQL command to select all records from the Students table
    select_query = "SELECT * FROM Students;"
    # Execute the SQL command
    cursor.execute(select_query)
    # Fetch one record
    student = cursor.fetchone()
    # Display the result
    print("First Student:")
    print(student)
Output:
First Student:
(1, 'Jane Doe', 23, 'jane@example.com')
How to Fetch Multiple Records
To fetch a specific number of records, you can use fetchmany(size):
import sqlite3
# Use 'with' to connect to the SQLite database
with sqlite3.connect('my_database.db') as connection:
    # Create a cursor object
    cursor = connection.cursor()
    # Write the SQL command to select all records from the Students table
    select_query = "SELECT * FROM Students;"
    # Execute the SQL command
    cursor.execute(select_query)
    # Fetch three records
    three_students = cursor.fetchmany(3)
    # Display results
    print("Three Students:")
    for student in three_students:
        print(student)
Output:
Three Students:
(1, 'Jane Doe', 23, 'jane@example.com')
(2, 'Bahadurjit Sabharwal', 18, 'tristanupadhyay@example.net')
(3, 'Zayyan Arya', 20, 'yashawinibhakta@example.org')
How to Use pandas for Better Data Presentation
For better data presentation, we can use the pandas library to create a DataFrame from our query results. This makes it easier to manipulate and visualize the data.
Here’s how to fetch all records and display them as a pandas DataFrame:
import sqlite3
import pandas as pd
# Use 'with' to connect to the SQLite database
with sqlite3.connect('my_database.db') as connection:
    # Write the SQL command to select all records from the Students table
    select_query = "SELECT * FROM Students;"
    # Use pandas to read SQL query directly into a DataFrame
    df = pd.read_sql_query(select_query, connection)
# Display the DataFrame
print("All Students as DataFrame:")
print(df)
Output:
All Students as DataFrame:
   id                  name  age                        email
0   1              Jane Doe   23             jane@example.com
1   2  Bahadurjit Sabharwal   18  tristanupadhyay@example.net
2   3           Zayyan Arya   20  yashawinibhakta@example.org
3   4         Hemani Shukla   18    gaurikanarula@example.com
4   5            Warda Kara   20           npatil@example.net
5   6       Mitali Nazareth   19          sparekh@example.org
The pd.read_sql_query() function executes the SQL query and directly returns the results as a pandas DataFrame.
How to Update and Delete Data
In this section, we’ll learn how to update existing records and delete records from our Students table using SQL commands in Python. This is essential for managing and maintaining your data effectively.
Updating Existing Records
To modify existing records in a database, we use the SQL UPDATE command. This command allows us to change the values of specific columns in one or more rows based on a specified condition.
For example, if we want to update a student's age, the SQL command would look like this:
UPDATE Students
SET age = 21
WHERE name = 'Jane Doe';
Now, let’s write Python code to update a specific student's age in our Students table.
import sqlite3
# Use 'with' to connect to the SQLite database
with sqlite3.connect('my_database.db') as connection:
    cursor = connection.cursor()
    # SQL command to update a student's age
    update_query = '''
    UPDATE Students
    SET age = ?
    WHERE name = ?;
    '''
    # Data for the update
    new_age = 21
    student_name = 'Jane Doe'
    # Execute the SQL command with the data
    cursor.execute(update_query, (new_age, student_name))
    # Commit the changes to save the update
    connection.commit()
    # Print a confirmation message
    print(f"Updated age for {student_name} to {new_age}.")
In this example, we used parameterized queries to prevent SQL injection.
How to Delete Records from the Table
To remove records from a database, we use the SQL DELETE command. This command allows us to delete one or more rows based on a specified condition.
For example, if we want to delete a student named 'Jane Doe', the SQL command would look like this:
DELETE FROM Students
WHERE name = 'Jane Doe';
Let’s write Python code to delete a specific student from our Students table using the with statement.
import sqlite3
# Use 'with' to connect to the SQLite database
with sqlite3.connect('my_database.db') as connection:
    cursor = connection.cursor()
    # SQL command to delete a student
    delete_query = '''
    DELETE FROM Students
    WHERE name = ?;
    '''
    # Name of the student to be deleted
    student_name = 'Jane Doe'
    # Execute the SQL command with the data
    cursor.execute(delete_query, (student_name,))
    # Commit the changes to save the deletion
    connection.commit()
    # Print a confirmation message
    print(f"Deleted student record for {student_name}.")
Important Considerations
Conditions: Always use the
WHEREclause when updating or deleting records to avoid modifying or removing all rows in the table. Without aWHEREclause, the command affects every row in the table.
Backup: It’s good practice to back up your database before performing updates or deletions, especially in production environments.
How to Use Transactions
A transaction is a sequence of one or more SQL operations that are treated as a single unit of work. In the context of a database, a transaction allows you to perform multiple operations that either all succeed or none at all. This ensures that your database remains in a consistent state, even in the face of errors or unexpected issues.
For example, if you are transferring money between two bank accounts, you would want both the debit from one account and the credit to the other to succeed or fail together. If one operation fails, the other should not be executed to maintain consistency.
Why Use Transactions?
Atomicity: Transactions ensure that a series of operations are treated as a single unit. If one operation fails, none of the operations will be applied to the database.
Consistency: Transactions help maintain the integrity of the database by ensuring that all rules and constraints are followed.
Isolation: Each transaction operates independently of others, preventing unintended interference.
Durability: Once a transaction is committed, the changes are permanent, even in the event of a system failure.
When to Use Transactions?
You should use transactions when:
Performing multiple related operations that must succeed or fail together.
Modifying critical data that requires consistency and integrity.
Working with operations that can potentially fail, such as financial transactions or data migrations.
How to Manage Transactions in Python
In SQLite, transactions are managed using the BEGIN, COMMIT, and ROLLBACK commands. However, when using the sqlite3 module in Python, you typically manage transactions through the connection object.
Starting a Transaction
A transaction begins implicitly when you execute any SQL statement. To start a transaction explicitly, you can use the BEGIN command:
cursor.execute("BEGIN;")
However, it’s usually unnecessary to start a transaction manually, as SQLite starts a transaction automatically when you execute an SQL statement.
How to Commit a Transaction
To save all changes made during a transaction, you use the commit() method. This makes all modifications permanent in the database.
connection.commit()
We have already used the commit() method in the above provided examples.
Rolling Back a Transaction
If something goes wrong and you want to revert the changes made during a transaction, you can use the rollback() method. This will undo all changes made since the transaction started.
connection.rollback()
Example of Using Transactions in Python
To illustrate the use of transactions in a real-world scenario, we’ll create a new table called Customers to manage customer accounts. In this example, we’ll assume each customer has a balance. We will add two customers to this table and perform a funds transfer operation between them.
First, let's create the Customers table and insert two customers:
import sqlite3
# Create the Customers table and add two customers
with sqlite3.connect('my_database.db') as connection:
    cursor = connection.cursor()
    # Create Customers table
    create_customers_table = '''
    CREATE TABLE IF NOT EXISTS Customers (
        id INTEGER PRIMARY KEY AUTOINCREMENT,
        name TEXT NOT NULL UNIQUE,
        balance REAL NOT NULL
    );
    '''
    cursor.execute(create_customers_table)
    # Insert two customers
    cursor.execute(
        "INSERT INTO Customers (name, balance) VALUES (?, ?);", ('Ashutosh', 100.0))
    cursor.execute(
        "INSERT INTO Customers (name, balance) VALUES (?, ?);", ('Krishna', 50.0))
    connection.commit()
Now, let’s perform the funds transfer operation between Ashutosh and Krishna:
import sqlite3
def transfer_funds(from_customer, to_customer, amount):
    with sqlite3.connect('my_database.db') as connection:
        cursor = connection.cursor()
        try:
            # Start a transaction
            cursor.execute("BEGIN;")
            # Deduct amount from the sender
            cursor.execute(
                "UPDATE Customers SET balance = balance - ? WHERE name = ?;", (amount, from_customer))
            # Add amount to the receiver
            cursor.execute(
                "UPDATE Customers SET balance = balance + ? WHERE name = ?;", (amount, to_customer))
            # Commit the changes
            connection.commit()
            print(
                f"Transferred {amount} from {from_customer} to {to_customer}.")
        except Exception as e:
            # If an error occurs, rollback the transaction
            connection.rollback()
            print(f"Transaction failed: {e}")
# Example usage
transfer_funds('Ashutosh', 'Krishna', 80.0)
In this example, we first created a Customers table and inserted two customers, Ashutosh with a balance of ₹100, and Krishna with a balance of ₹50. We then performed a funds transfer of ₹80 from Ashutosh to Krishna. By using transactions, we ensure that both the debit from Ashutosh's account and the credit to Krishna's account are executed as a single atomic operation, maintaining data integrity in the event of any errors. If the transfer fails (for example, due to insufficient funds), the transaction will roll back, leaving both accounts unchanged.
How to Optimize SQLite Query Performance with Indexing
Indexing is a powerful technique used in databases to improve query performance. An index is essentially a data structure that stores the location of rows based on specific column values, much like an index at the back of a book helps you quickly locate a topic.
Without an index, SQLite has to scan the entire table row by row to find the relevant data, which becomes inefficient as the dataset grows. By using an index, SQLite can jump directly to the rows you need, significantly speeding up query execution.
How to Populate the Database with Fake Data
To effectively test the impact of indexing, we need a sizable dataset. Instead of manually adding records, we can use the faker library to quickly generate fake data. In this section, we’ll generate 10,000 fake records and insert them into our Students table. This will simulate a real-world scenario where databases grow large, and query performance becomes important.
We will use the executemany() method to insert the records as below:
import sqlite3
from faker import Faker
# Initialize the Faker library
fake = Faker(['en_IN'])
def insert_fake_students(num_records):
    """Generate and insert fake student data into the Students table."""
    fake_data = [(fake.name(), fake.random_int(min=18, max=25),
                  fake.email()) for _ in range(num_records)]
    # Use 'with' to handle the database connection
    with sqlite3.connect('my_database.db') as connection:
        cursor = connection.cursor()
        # Insert fake data into the Students table
        cursor.executemany('''
        INSERT INTO Students (name, age, email)
        VALUES (?, ?, ?);
        ''', fake_data)
        connection.commit()
    print(f"{num_records} fake student records inserted successfully.")
# Insert 10,000 fake records into the Students table
insert_fake_students(10000)
By running this script, 10,000 fake student records will be added to the Students table. In the next section, we'll query the database and compare the performance of queries with and without indexing.
How to Query Without Indexes
In this section, we’ll query the Students table without any indexes to observe how SQLite performs when there are no optimizations in place. This will serve as a baseline to compare the performance when we add indexes later.
Without indexes, SQLite performs a full table scan, which means that it must check every row in the table to find matching results. For small datasets, this is manageable, but as the number of records grows, the time taken to search increases dramatically. Let’s see this in action by running a basic SELECT query to search for a specific student by name and measure how long it takes.
First, we’ll query the Students table by looking for a student with a specific name. We’ll log the time taken to execute the query using Python’s time module to measure the performance.
import sqlite3
import time
def query_without_index(search_name):
    """Query the Students table by name without an index and measure the time taken."""
    # Connect to the database using 'with'
    with sqlite3.connect('my_database.db') as connection:
        cursor = connection.cursor()
        # Measure the start time
        start_time = time.perf_counter_ns()
        # Perform a SELECT query to find a student by name
        cursor.execute('''
        SELECT * FROM Students WHERE name = ?;
        ''', (search_name,))
        # Fetch all results (there should be only one or a few in practice)
        results = cursor.fetchall()
        # Measure the end time
        end_time = time.perf_counter_ns()
        # Calculate the total time taken
        elapsed_time = (end_time - start_time) / 1000
        # Display the results and the time taken
        print(f"Query completed in {elapsed_time:.5f} microseconds.")
        print("Results:", results)
# Example: Searching for a student by name
query_without_index('Ojasvi Dhawan')
Here’s the output:
Query completed in 1578.10000 microseconds.
Results: [(104, 'Ojasvi Dhawan', 21, 'lavanya26@example.com')]
By running the above script, you'll see how long it takes to search the Students table without any indexes. For example, if there are 10,000 records in the table, the query might take 1000-2000 microseconds depending on the size of the table and your hardware. This may not seem too slow for a small dataset, but the performance will degrade as more records are added.
We use time.perf_counter_ns() to measure the time taken for the query execution in nanoseconds. This method is highly accurate for benchmarking small time intervals. We convert the time to microseconds(us) for easier readability.
Introducing the Query Plan
When working with databases, understanding how queries are executed can help you identify performance bottlenecks and optimize your code. SQLite provides a helpful tool for this called EXPLAIN QUERY PLAN, which allows you to analyze the steps SQLite takes to retrieve data.
In this section, we’ll introduce how to use EXPLAIN QUERY PLAN to visualize and understand the inner workings of a query—specifically, how SQLite performs a full table scan when no index is present.
Let’s use EXPLAIN QUERY PLAN to see how SQLite retrieves data from the Students table without any indexes. We’ll search for a student by name, and the query plan will reveal the steps SQLite takes to find the matching rows.
import sqlite3
def explain_query(search_name):
    """Explain the query execution plan for a SELECT query without an index."""
    with sqlite3.connect('my_database.db') as connection:
        cursor = connection.cursor()
        # Use EXPLAIN QUERY PLAN to analyze how the query is executed
        cursor.execute('''
        EXPLAIN QUERY PLAN
        SELECT * FROM Students WHERE name = ?;
        ''', (search_name,))
        # Fetch and display the query plan
        query_plan = cursor.fetchall()
        print("Query Plan:")
        for step in query_plan:
            print(step)
# Example: Analyzing the query plan for searching by name
explain_query('Ojasvi Dhawan')
When you run this code, SQLite will return a breakdown of how it plans to execute the query. Here’s an example of what the output might look like:
Query Plan:
(2, 0, 0, 'SCAN Students')
This indicates that SQLite is scanning the entire Students table (a full table scan) to find the rows where the name column matches the provided value (Ojasvi Dhawan). Since there is no index on the name column, SQLite must examine each row in the table.
How to Create an Index
Creating an index on a column allows SQLite to find rows more quickly during query operations. Instead of scanning the entire table, SQLite can use the index to jump directly to the relevant rows, significantly speeding up queries—especially those involving large datasets.
To create an index, use the following SQL command:
CREATE INDEX IF NOT EXISTS index-name ON table (column(s));
In this example, we will create an index on the name column of the Students table. Here’s how you can do it using Python:
import sqlite3
import time
def create_index():
    """Create an index on the name column of the Students table."""
    with sqlite3.connect('my_database.db') as connection:
        cursor = connection.cursor()
        # SQL command to create an index on the name column
        create_index_query = '''
        CREATE INDEX IF NOT EXISTS idx_name ON Students (name);
        '''
        # Measure the start time
        start_time = time.perf_counter_ns()
        # Execute the SQL command to create the index
        cursor.execute(create_index_query)
        # Measure the start time
        end_time = time.perf_counter_ns()
        # Commit the changes
        connection.commit()
        print("Index on 'name' column created successfully!")
        # Calculate the total time taken
        elapsed_time = (end_time - start_time) / 1000
        # Display the results and the time taken
        print(f"Query completed in {elapsed_time:.5f} microseconds.")
# Call the function to create the index
create_index()
Output:
Index on 'name' column created successfully!
Query completed in 102768.60000 microseconds.
Even though creating the index takes this long (102768.6 microseconds), it's a one-time operation. You will still get substantial speed-up when running multiple queries. In the following sections, we will query the database again to observe the performance improvements made possible by this index.
How to Query with Indexes
In this section, we will perform the same SELECT query we executed earlier, but this time we will take advantage of the index we created on the name column of the Students table. We'll measure and log the execution time to observe the performance improvements provided by the index.
import sqlite3
import time
def query_with_index(student_name):
    """Query the Students table using an index on the name column."""
    with sqlite3.connect('my_database.db') as connection:
        cursor = connection.cursor()
        # SQL command to select a student by name
        select_query = 'SELECT * FROM Students WHERE name = ?;'
        # Measure the execution time
        start_time = time.perf_counter_ns()  # Start the timer
        # Execute the query with the provided student name
        cursor.execute(select_query, (student_name,))
        result = cursor.fetchall()  # Fetch all results
        end_time = time.perf_counter_ns()  # End the timer
        # Calculate the elapsed time in microseconds
        execution_time = (end_time - start_time) / 1000
        # Display results and execution time
        print(f"Query result: {result}")
        print(f"Execution time with index: {execution_time:.5f} microseconds")
# Example: Searching for a student by name
query_with_index('Ojasvi Dhawan')
Here’s what we get in the output:
Query result: [(104, 'Ojasvi Dhawan', 21, 'lavanya26@example.com')]
Execution time with index: 390.70000 microseconds
We can observe a significant reduction in execution time compared to when the query was performed without an index.
Let’s analyze the query execution plan for the query with the index on the name column of the Students table. If you execute the same script again to explain the query, you’ll get the below output:
Query Plan:
(3, 0, 0, 'SEARCH Students USING INDEX idx_name (name=?)')
The plan now shows that the query uses the index idx_name, significantly reducing the number of rows that need to be scanned, which leads to faster query execution.
Comparing Performance Results
Now, let's summarize the performance results we obtained when querying with and without indexes.
Execution Time Comparison
| Query Type | Execution Time (microseconds) |
| Without Index | 1578.1 |
| With Index | 390.7 |
Performance Improvement Summary
The query with the index is approximately 4.04 times faster than the query without the index.
The execution time improved by about 75.24% after adding the index.
Best Practices for Using Indexes
Indexes can significantly enhance the performance of your SQLite database, but they should be used judiciously. Here are some best practices to consider when working with indexes:
When and Why to Use Indexes
Frequent Query Columns: Use indexes on columns that are frequently used in
SELECTqueries, especially those used inWHERE,JOIN, andORDER BYclauses. This is because indexing these columns can drastically reduce query execution time.Uniqueness Constraints: When you have columns that must hold unique values (like usernames or email addresses), creating an index can enforce this constraint efficiently.
Large Datasets: For tables with a large number of records, indexes become increasingly beneficial. They enable quick lookups, which is essential for maintaining performance as your data grows.
Composite Indexes: Consider creating composite indexes for queries that filter or sort by multiple columns. For example, if you often search for students by both
nameandage, an index on both columns can optimize such queries.
Potential Downsides of Indexes
While indexes provide significant advantages, there are some potential downsides:
Slower Insert/Update Operations: When you insert or update records in a table with indexes, SQLite must also update the index, which can slow down these operations. This is because each insert or update requires additional overhead to maintain the index structure.
Increased Storage Requirements: Indexes consume additional disk space. For large tables, the storage cost can be substantial. Consider this when designing your database schema, especially for systems with limited storage resources.
Complex Index Management: Having too many indexes can complicate database management. It may lead to situations where you have redundant indexes, which can degrade performance rather than enhance it. Regularly reviewing and optimizing your indexes is a good practice.
Indexes are powerful tools for optimizing database queries, but they require careful consideration. Striking a balance between improved read performance and the potential overhead on write operations is key. Here are some strategies for achieving this balance:
Monitor Query Performance: Use SQLite’s
EXPLAIN QUERY PLANto analyze how your queries perform with and without indexes. This can help identify which indexes are beneficial and which may be unnecessary.Regular Maintenance: Periodically review your indexes and assess whether they are still needed. Remove redundant or rarely used indexes to streamline your database operations.
Test and Evaluate: Before implementing indexes in a production environment, conduct thorough testing to understand their impact on both read and write operations.
By following these best practices, you can leverage the benefits of indexing while minimizing potential drawbacks, ultimately enhancing the performance and efficiency of your SQLite database.
How to Handle Errors and Exceptions
In this section, we’ll discuss how to handle errors and exceptions when working with SQLite in Python. Proper error handling is crucial for maintaining the integrity of your database and ensuring that your application behaves predictably.
Common Errors in SQLite Operations
When interacting with an SQLite database, several common errors may arise:
Constraint Violations: This occurs when you try to insert or update data that violates a database constraint, such as primary key uniqueness or foreign key constraints. For example, trying to insert a duplicate primary key will trigger an error.
Data Type Mismatches: Attempting to insert data of the wrong type (for example, inserting a string where a number is expected) can lead to an error.
Database Locked Errors: If a database is being written to by another process or connection, trying to access it can result in a "database is locked" error.
Syntax Errors: Mistakes in your SQL syntax will result in errors when you try to execute your commands.
How to Use Python's Exception Handling
Python’s built-in exception handling mechanisms (try and except) are essential for managing errors in SQLite operations. By using these constructs, you can catch exceptions and respond appropriately without crashing your program.
Here’s a basic example of how to handle errors when inserting data into the database:
import sqlite3
def add_customer_with_error_handling(name, balance):
    """Add a new customer with error handling."""
    try:
        with sqlite3.connect('my_database.db') as connection:
            cursor = connection.cursor()
            cursor.execute(
                "INSERT INTO Customers (name, balance) VALUES (?, ?);", (name, balance))
            connection.commit()
            print(f"Added customer: {name} with balance: {balance}")
    except sqlite3.IntegrityError as e:
        print(f"Error: Integrity constraint violated - {e}")
    except sqlite3.OperationalError as e:
        print(f"Error: Operational issue - {e}")
    except Exception as e:
        print(f"An unexpected error occurred: {e}")
# Example usage
add_customer_with_error_handling('Vishakha', 100.0)  # Valid
add_customer_with_error_handling('Vishakha', 150.0)  # Duplicate entry
In this example:
We catch
IntegrityError, which is raised for violations like unique constraints.We catch
OperationalErrorfor general database-related issues (like database locked errors).We also have a generic
exceptblock to handle any unexpected exceptions.
Output:
Added customer: Vishakha with balance: 100.0
Error: Integrity constraint violated - UNIQUE constraint failed: Customers.name
Best Practices for Ensuring Database Integrity
Use Transactions: Always use transactions (as discussed in the previous section) when performing multiple related operations. This helps ensure that either all operations succeed or none do, maintaining consistency.
Validate Input Data: Before executing SQL commands, validate the input data to ensure it meets the expected criteria (for example, correct types, within allowable ranges).
Catch Specific Exceptions: Always catch specific exceptions to handle different types of errors appropriately. This allows for clearer error handling and debugging.
Log Errors: Instead of just printing errors to the console, consider logging them to a file or monitoring system. This will help you track issues in production.
Graceful Degradation: Design your application to handle errors gracefully. If an operation fails, provide meaningful feedback to the user rather than crashing the application.
Regularly Backup Data: Regularly back up your database to prevent data loss in case of critical failures or corruption.
Use Prepared Statements: Prepared statements help prevent SQL injection attacks and can also provide better performance for repeated queries.
How to Export and Import Data [Bonus Section]
In this section, we will learn how to export data from an SQLite database to common formats like CSV and JSON, as well as how to import data into SQLite from these formats using Python. This is useful for data sharing, backup, and integration with other applications.
Exporting Data from SQLite to CSV
Exporting data to a CSV (Comma-Separated Values) file is straightforward with Python’s built-in libraries. CSV files are widely used for data storage and exchange, making them a convenient format for exporting data.
Here’s how to export data from an SQLite table to a CSV file:
import sqlite3
import csv
def export_to_csv(file_name):
    """Export data from the Customers table to a CSV file."""
    with sqlite3.connect('my_database.db') as connection:
        cursor = connection.cursor()
        # Execute a query to fetch all customer data
        cursor.execute("SELECT * FROM Customers;")
        customers = cursor.fetchall()
        # Write data to CSV
        with open(file_name, 'w', newline='') as csv_file:
            csv_writer = csv.writer(csv_file)
            csv_writer.writerow(['ID', 'Name', 'Balance'])  # Writing header
            csv_writer.writerows(customers)  # Writing data rows
        print(f"Data exported successfully to {file_name}.")
# Example usage
export_to_csv('customers.csv')
How to Export Data to JSON
Similarly, you can export data to a JSON (JavaScript Object Notation) file, which is a popular format for data interchange, especially in web applications.
Here’s an example of how to export data to JSON:
import json
import sqlite3
def export_to_json(file_name):
    """Export data from the Customers table to a JSON file."""
    with sqlite3.connect('my_database.db') as connection:
        cursor = connection.cursor()
        # Execute a query to fetch all customer data
        cursor.execute("SELECT * FROM Customers;")
        customers = cursor.fetchall()
        # Convert data to a list of dictionaries
        customers_list = [{'ID': customer[0], 'Name': customer[1],
                           'Balance': customer[2]} for customer in customers]
        # Write data to JSON
        with open(file_name, 'w') as json_file:
            json.dump(customers_list, json_file, indent=4)
        print(f"Data exported successfully to {file_name}.")
# Example usage
export_to_json('customers.json')
How to Import Data into SQLite from CSV
You can also import data from a CSV file into an SQLite database. This is useful for populating your database with existing datasets.
Here's how to import data from a CSV file:
import csv
import sqlite3
def import_from_csv(file_name):
    """Import data from a CSV file into the Customers table."""
    with sqlite3.connect('my_database.db') as connection:
        cursor = connection.cursor()
        # Open the CSV file for reading
        with open(file_name, 'r') as csv_file:
            csv_reader = csv.reader(csv_file)
            next(csv_reader)  # Skip the header row
            # Insert each row into the Customers table
            for row in csv_reader:
                cursor.execute(
                    "INSERT INTO Customers (name, balance) VALUES (?, ?);", (row[1], row[2]))
        connection.commit()
        print(f"Data imported successfully from {file_name}.")
# Example usage
import_from_csv('customer_data.csv')
How to Import Data into SQLite from JSON
Similarly, importing data from a JSON file is simple. You can read the JSON file and insert the data into your SQLite table.
Here's how to do it:
import json
import sqlite3
def import_from_json(file_name):
    """Import data from a JSON file into the Customers table."""
    with sqlite3.connect('my_database.db') as connection:
        cursor = connection.cursor()
        # Open the JSON file for reading
        with open(file_name, 'r') as json_file:
            customers_list = json.load(json_file)
            # Insert each customer into the Customers table
            for customer in customers_list:
                cursor.execute("INSERT INTO Customers (name, balance) VALUES (?, ?);", (customer['Name'], customer['Balance']))
        connection.commit()
        print(f"Data imported successfully from {file_name}.")
# Example usage
import_from_json('customer_data.json')
Wrapping Up
And that’s a wrap! This guide has introduced you to the fundamentals of working with SQLite in Python, covering everything from setting up your environment to querying and manipulating data, as well as exporting and importing information. I hope you found it helpful and that it has sparked your interest in using SQLite for your projects.
Now it's time to put your newfound knowledge into practice! I encourage you to create your project using SQLite and Python. Whether it’s a simple application for managing your library, a budgeting tool, or something unique, the possibilities are endless.
Once you’ve completed your project, share it on Twitter and tag me! I’d love to see what you’ve created and celebrate your accomplishments.
You can find all the code from this tutorial on GitHub. Thank you for following along, and happy coding!
Generate Table of Contents for your freeCodeCamp articles for free using the TOC Generator tool.